
| W ostatnim czasie udało mi się wykończyć skrzydła. Poniekąd to one też trochę wykończyły mnie, bo nie było łatwo. Nie mniej jednak, doprowadziłem je do prawie finalnego etapu. Prawie, bo nie łączę ich jeszcze na stałe z resztą modelu, a po połączeniu będę musiał jeszcze parę rzeczy dodać. Poza tym, w międzyczasie powstało trochę elementów przybliżających budowę do końca. Trochę się tego nazbierało. | Recently, I finally finished the wings. Actually, they exhausted me a bit, because it was not easy. Nevertheless, I brought them to the almost final stage. Almost, because I do not connect them permanently with the rest of the model. After that, I will have to add a few more details. Meanwhile, some elements bringing the construction closer to the end have been built. I have a lot to show you today. |

| Okazuje się, że lotki, na pozór proste elementy, sprawiły sporo trudności. Według mnie, nie są najlepiej dopasowane do wycięcia w skrzydłach. Dopasowuję lotkę równo z krawędzią spływu klapy oraz krawędzią spływu końcówki skrzydła. Na spodzie wszystko wygląda dobrze, ale na górnej powierzchni powstaje ogromna szpara pomiędzy poszyciem skrzydła, a lotką. Powinno tam być trochę miejsca, ale nie tak dużo. Kiedy wciskam lotkę głębiej w wycięcie w skrzydle wygląda to o wiele lepiej, ale nie mogę tego tak zostawić, bo zaburza to krawędź spływu. Moim zdaniem oddzielna lotka mogłaby być większa. Wydłużenie jej o tyle, żeby chowała się głębiej powinno załatwić sprawę. Problem w tym, że u mnie za późno na takie rozwiązanie. Wpadłem na inny pomysł. | It turns out that the ailerons, which I thought would be simple elements, caused a lot of difficulties. In my opinion, they are not fit properly to the place in the wing cutout. I tried to fit the aileron with the trailing edge of the flap and the trailing edge of the wing tip. On the underside, everything looks fine, but on the top, there is a huge gap between the wing skin and the aileron. There should be some space there, but not that much. It looks a lot better when I push the aileron deeper into the wing cutout, but I can't leave it that way because it disrupts the trailing edge. In my opinion, a separate aileron part could be larger. Lengthening it enough to hide it deeper should do the trick. The problem is that for me it is too late for such a solution. I came to another idea. |
.jpg)
.jpg)
| Postanowiłem wydłużyć górne poszycie skrzydła, a konkretnie wnęki na lotkę doklejając 2 mm pasek pozyskany z zapasu koloru. To znaczy z niewykorzystanego paska łączącego, bo w tym modelu niestety nie ma zapasu koloru. A zatem, dopasowałem odpowiedni kawałek, przeszlifowałem jego krawędź, wyretuszowałem i dokleiłem na BCG w odpowiednim miejscu. po tym zabiegu szpara pomiędzy lotką, a krawędzią spływu nie jest już tak drastyczna, łączenie dodatkowego paska poszycia i skrzydła wyszło dobrze i nie rzuca się mocno w oczy. Sytuacja opanowana. | I decided to lengthen the upper skin of the wing, more specifically the aileron recess by glueing a 2 mm strip obtained from the spare colour reserve. That is, from an unused connecting strip, because in this model there is, unfortunately, no spare colour. So, I fitted the right piece, sanded the edge of it, retouched it, and stuck it on the water glue in the right place. after this treatment, the gap between the aileron and the trailing edge is not so visible anymore, joining the additional sheathing strip and the wing turned out well and is not very noticeable. The situation was under control again. |
.jpg)
.jpg)
.jpg)
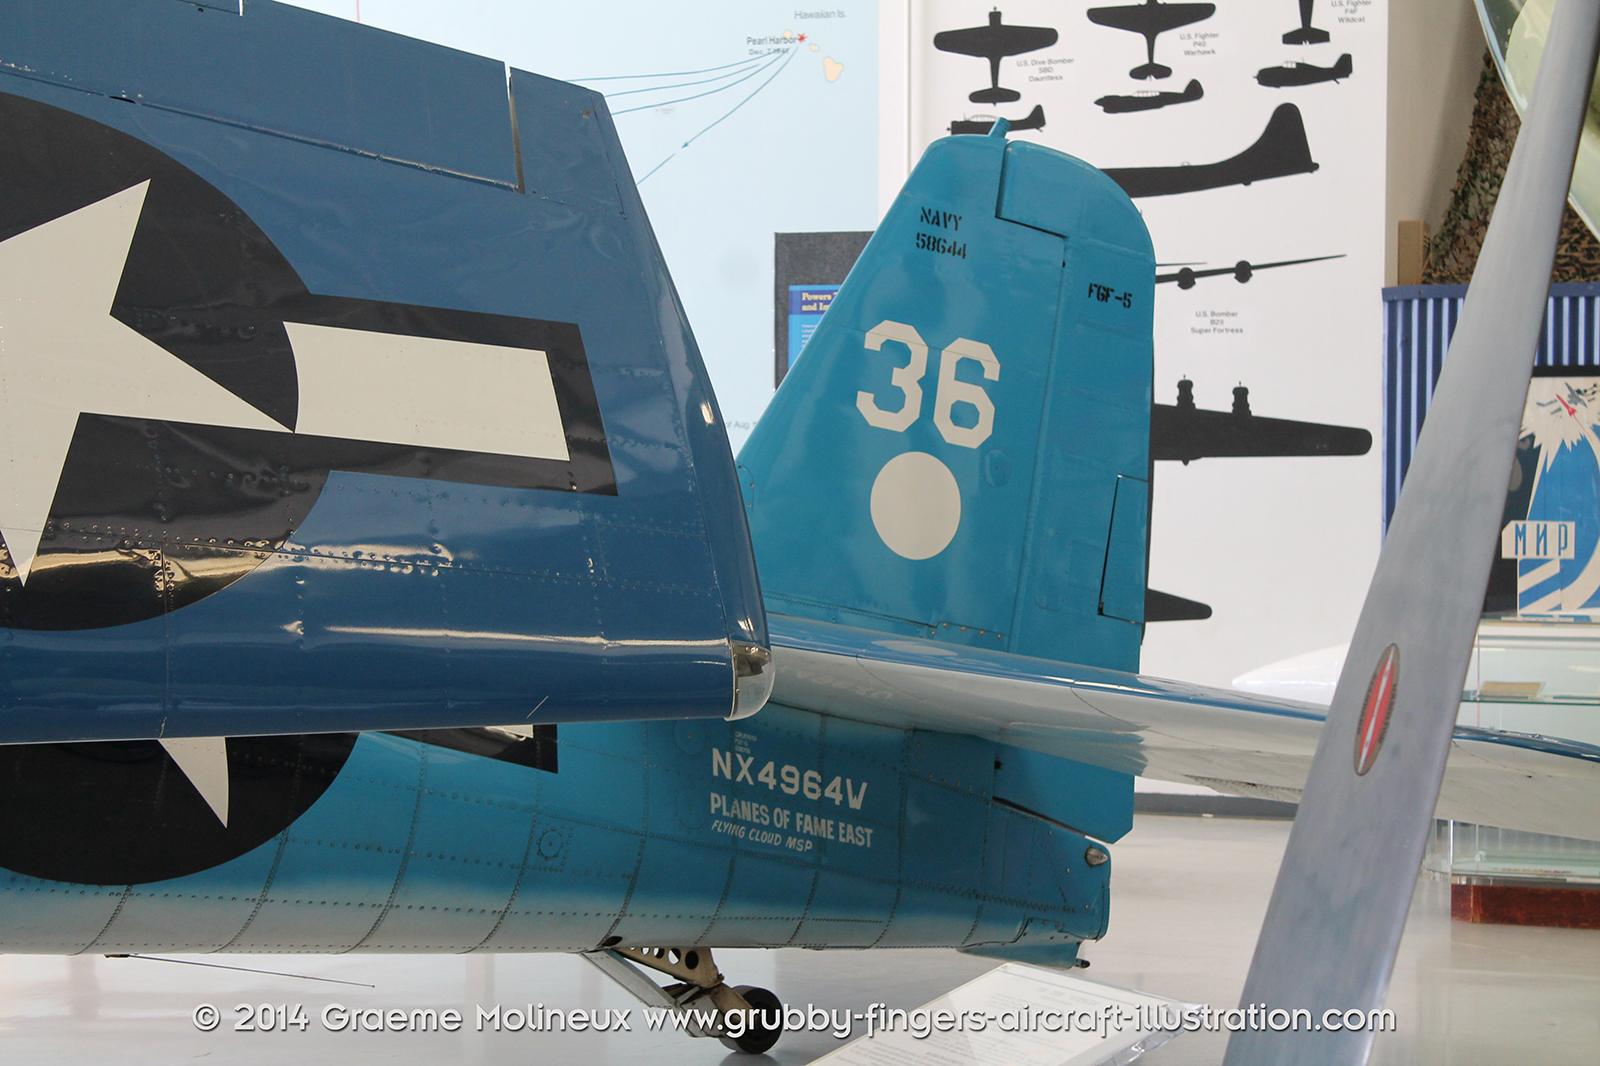
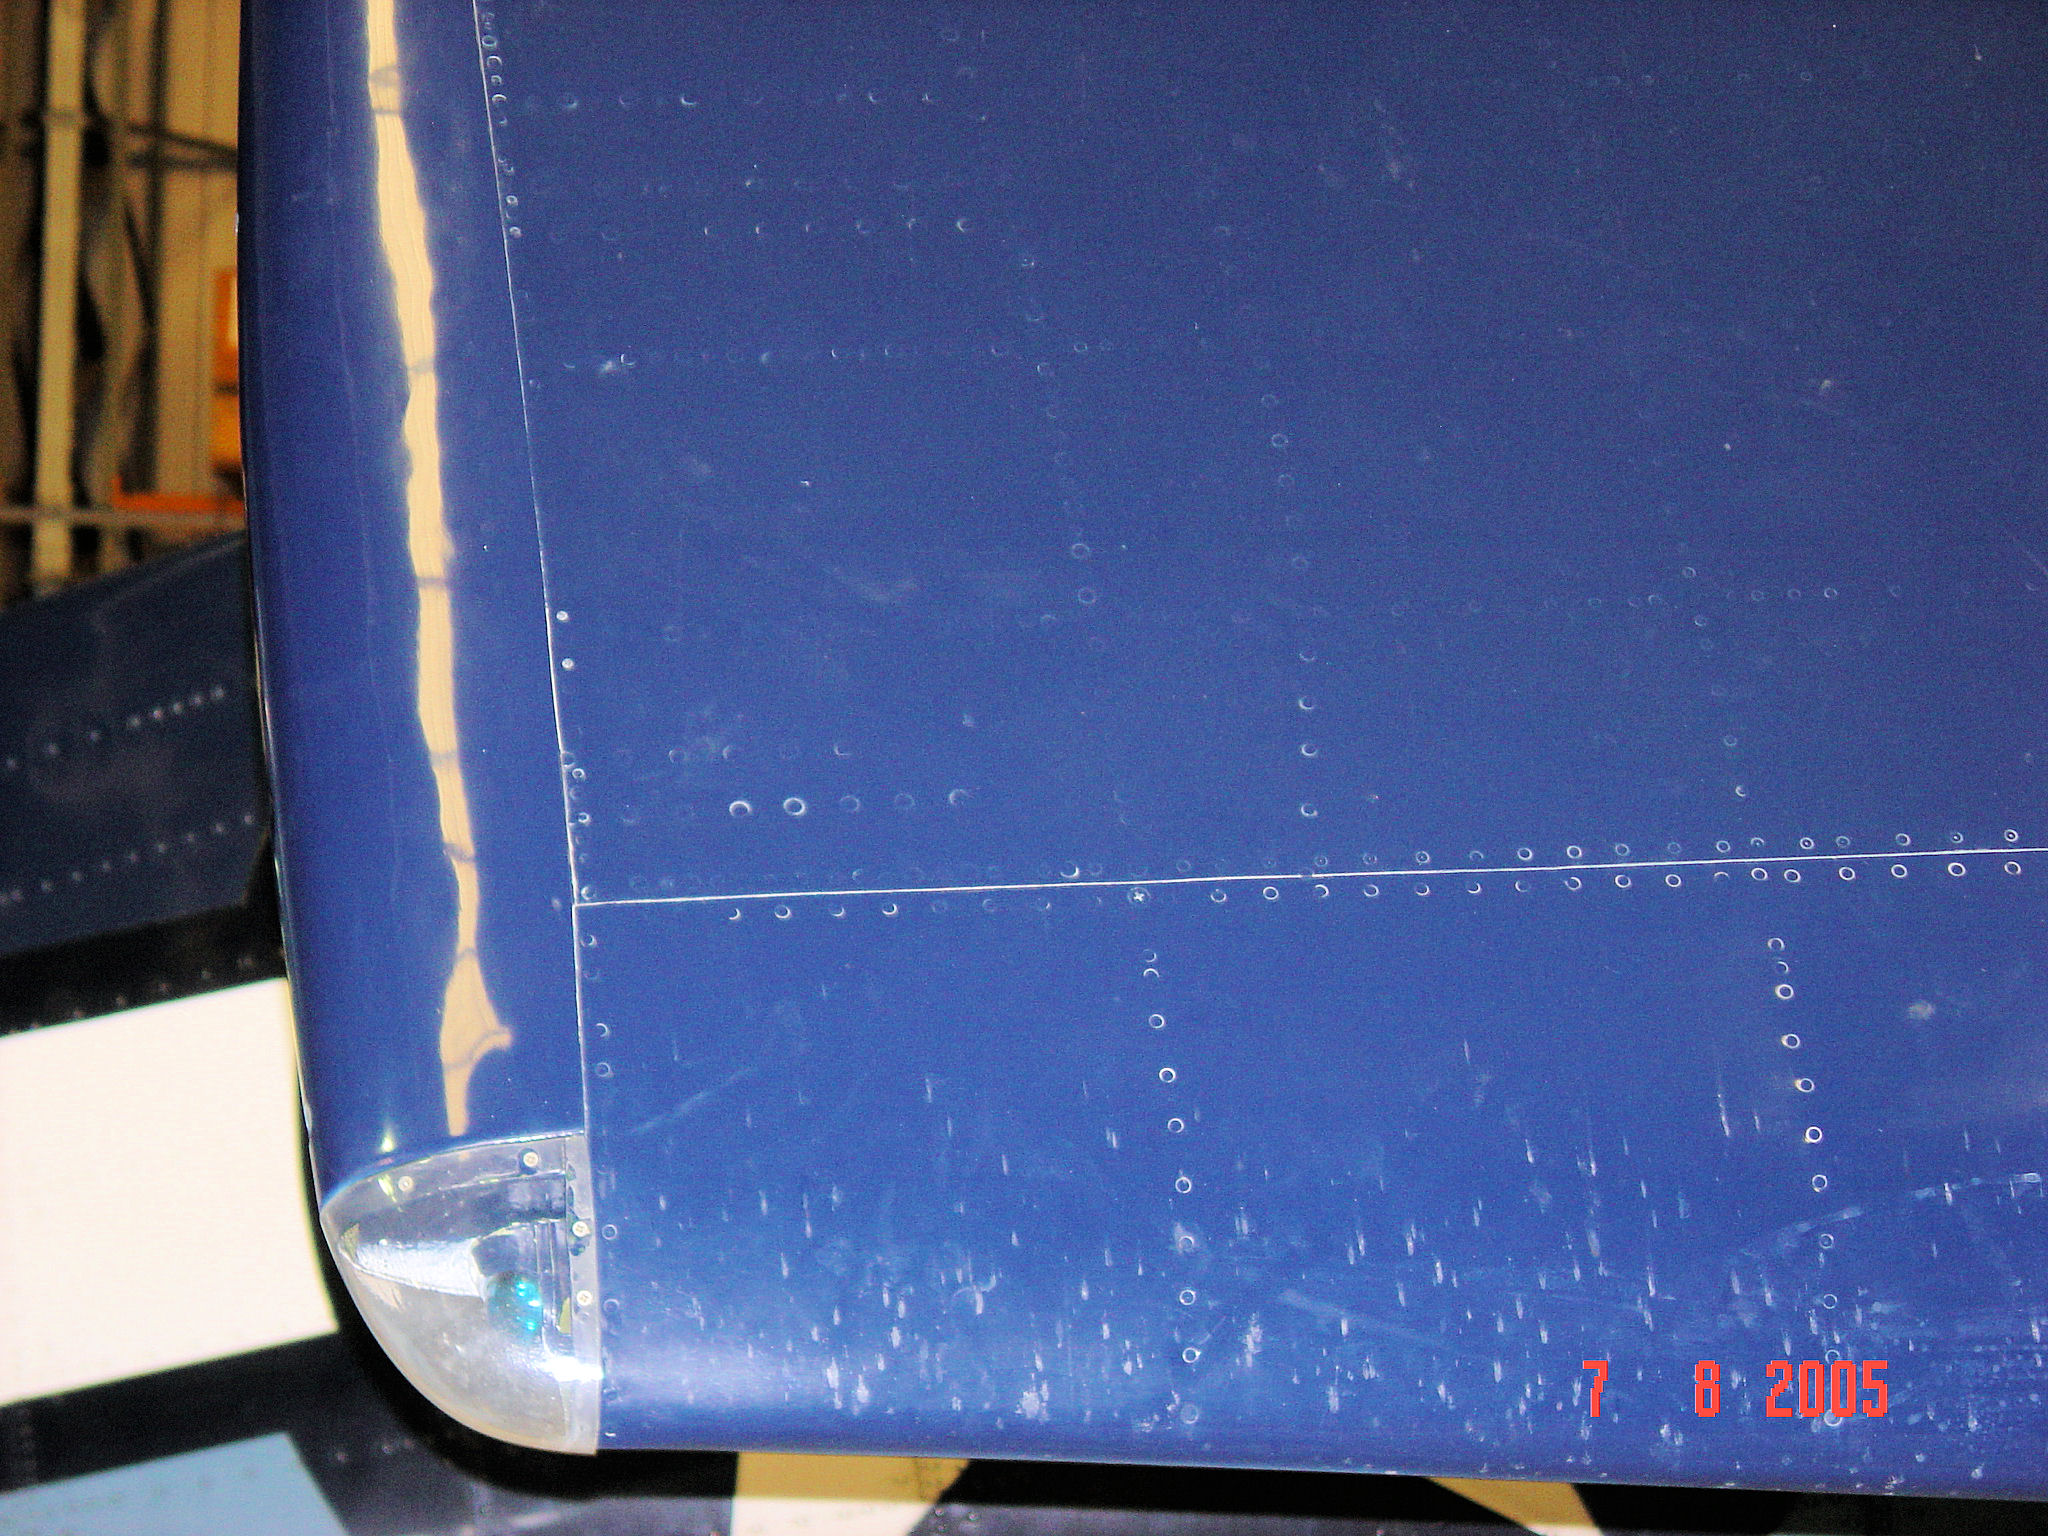
| Końcówki skrzydeł. Tutaj znowu ukłony dla autora modelu, za to, że zaprojektował je w dwóch wersjach - z czarnym konturem i bez. Wybrałem oczywiście te bez konturu. Udało się je ładnie uformować i skleić tak, że łączenia są bardzo delikatne, nie ma ordynarnej czarnej krechy. Po obu stronach końcówki wyszły mi za długie o około 1 mm, przyciąłem i to rozwiązało problem. Problemem, który stworzyłem sobie sam (a tak już mam, że to robię) są osłony lampek pozycyjnych. Na żadnym zdjęciu Hellcata nie widziałem żeby były wykonane zabarwionego materiału, wszędzie widziałem je przeźroczyste. A zatem: z zapasowego elementu, tego z czarnymi konturami wykonałem kopyto i wytłoczyłem osłonki. W środku wstawiłem imitacje zielonej i czerwonej żarówki. Tu jeszcze jedno zdjęcie z innego Hellcata. | Wing tips. Here again, a respect for the author of the model, for designing them in two versions - with and without a black outline. Of course, I chose the ones without an outline. I managed to form them nicely and put them together so that the joining lines are very delicate, there is no black line. On both sides, the tips were too long for me by about 1 mm, I cut them and that solved the problem. The problem that I created myself (and this is what I usually do) is the position lamp covers. In any photo of Hellcat I did not see that they were made of coloured material, I saw them transparent everywhere. So: from the spare element, the one with black contours, I made a form and pressed the covers from VACU. Inside, I put imitations of green and red light bulbs. Here is another photo of the position light. |
.jpg)
.jpg)
.jpg)
.jpg)
.jpg)
| W międzyczasie pracowałem nad wykończeniem wewnętrznych
powierzchni w skrzydłach. Doprowadziłem prawe skrzydło do takiego samego stanu
jak lewe, a następnie zabrałem się za uzupełnianie kolejnych elementów - na zdjęciach widać co doszło, bo używałem
zielonego kartonu, łatwo rozpoznać nowe elementy. Najbardziej pracochłonne było
przyklejenie nitów - na zdjęciach samolotu widać wyraźnie nity na elementach
wewnątrz skrzydła. Postanowiłem nakleić je w najbardziej widocznych miejscach.
Wybiłem je przy pomocy specjalnie przygotowanego wybijaka z igły lekarskiej 0,9
mm. Uciąłem ją i zaostrzyłem jej koniec na szlifierce. Tak przygotowanym
narzędziem wybiłem sobie imitacje nitów i naniosłem je w odpowiednich
miejscach. | Meanwhile, I was working on finishing the interior surfaces of the wings. I brought the right wing to the same condition as the left one, and then I started completing the next elements - the photos show what I added, because I used green cardboard, so it is easy to recognize new elements. The most time-consuming task was to fix the rivets - the photos of the plane clearly show the rivets on the elements inside the wing. I decided to put them in the most visible places. I punched them with a specially prepared punch from a 0.9 mm medical needle. I cut it off and sharpened its end on a grinder. With the prepared tool, I knocked out imitations of rivets and applied them in the right places. |
.jpg)
.jpg)
.jpg)
.jpg)
.jpg)
| Na tym etapie postanowiłem zabezpieczyć poszycie skrzydeł i przygotować je do malowania - w pierwszej kolejności podkład (szary akrylowy Vallejo surface primer). Tak jak już wcześniej wspominałem, poważnym problemem był dla mnie wybór koloru na jaki pomalować wewnętrzne fragmenty skrzydła - komorę podwozia oraz lukę mechanizmu składania. Ostatecznie zdecydowałem się, że wszystko będzie szare w kolorze przypominającym spód kadłuba. Wcześniej pomalowałem luki mechanizmu składania na interior green i to nie wyglądało dobrze. Niestety, żeby zakryć zielony białym musiałem nałożyć kilka warstw więcej. Kilka warstw więcej niestety negatywnie odbija się na wyglądzie całej powierzchni, tak plastusiowato to miejscami wygląda. W wyniku malowania wyszły też na jaw niedociągnięcia powierzchni w kilku miejscach. Malowanie nie należy do moich najmocniejszych stron, ale na czymś trzeba się uczyć. Po malowaniu dodałem jeszcze trochę przewodów, które rozmieściłem na podstawie zdjęć oryginału. | At this stage, I decided to secure the wings sheathing and prepare them for painting - first of all, the primer (Vallejo grey acrylic surface primer). As I mentioned before, a serious problem for me was the choice of the colour on which to paint the internal parts of the wing - the landing gear hatch and the folding mechanism gap. In the end, I decided everything would be grey similar to the underside of the fuselage. I had painted the folding mechanism gaps on the interior green before and it didn't look good. Unfortunately, to cover the green with white, I had to apply a few more layers. A few more layers, unfortunately, have a negative impact on the appearance of the entire surface, so it looks not especially nice. As a result of the painting, surface shortcomings in several places were also revealed. Painting is not my strongest point, but somehow I have to learn it. After painting, I added some more wires, which I placed on the basis of the original photos. |
.jpg)
.jpg)
.jpg)
.jpg)
.jpg)
.jpg)
.jpg)
| Skleiłem również golenie podwozia. Będą potrzebne do przymierzenia podczas montażu stałych części skrzydeł. Brawa dla autora i wydawcy za wydrukowanie goleni na offsecie oraz za podanie na rysunku montażowym ich docelowej średnicy. To znacznie ułatwia pracę nad tym zespołem. Składając elementy podwozia trafiłem na kolejny zabawny akcent związany z laserowymi dodatkami, podobny jak ten przy łopatach śmigieł. Elementy G9-G11 są wycięte laserem. O ile w przypadku G9 ma to sens, to G10 i G11 są przykładem tego jak wydawca nie zwraca uwagi na to co wydaje. Jak to w ogóle uformować? Jakiś pomysł jak użyć tych elementów? Tam jest też błąd w numeracji, bo G11 pada dwa razy na instrukcji. Jest to o tyle irytujące, że przykładowo początkujący modelarz nieświadomy tych pułapek może zostać wpuszczony w przysłowiowe maliny i skleić z G9+G10+G10 trzymilimetrowy przydatny do niczego element, który później nie będzie kompatybilny z komorami i goleniami podwozia. | I also made the undercarriage legs. They will be needed when assembling the fixed parts of the wings. Congratulations to the author and publisher for printing the undercarriage legs on thin paper and for specifying their target diameter on the assembly drawing. This makes it much easier to work on these elements. I also encountered another funny mistake in the laser cut set. Similar to the one on the propeller blades. The G9-G11 elements are laser cut on the 1mm cardboard. While it makes sense with the G9, the G10 and G11 are examples of how the publisher doesn't pay attention to what he releases. How should I use these parts? There is also a numbering error because G11 falls twice on the manual. This is irritating because, for example, a beginner modeller, unaware of these mistakes, maybe mislead and glue the G9 + G10 + G10 together obtaining a three-millimetre thick unuseful element, which later will not be compatible with the gear hatches and legs. |
.jpg)
| Golenie składają się dobrze, to stosunkowo prosta konstrukcja. Na tym
etapie brakuje jeszcze co prawda kilku elementów, np. "nożyc", ale
uzupełnię je przy końcowym montażu. W pewne zakłopotanie może wprowadzić ilość
elementów, które zostają po ich sklejeniu. Większość z nich jest zdublowanych,
w przypadku wykorzystania laserowych dodatków niektóre elementy występują nawet
poczwórnie. Części G19 pojawiają się np. podwójnie w wycinance, podwójnie wśród
elementów dodatkowych wyciętych laserem na kartonie około 0,3 mm i podwójnie
wycięte na 1 mm tekturze ze szkieletem. Trochę jak przy samodzielnym składaniu
mebli, zawsze zostaną jakieś niewykorzystane śrubki czy podkładki. Golenie musiałem lekko zmodyfikować, żeby dopasować je do przeróbek w skrzydłach - musiałem zwiększyć wysokość elementów G9 oraz skrócić G19 tak aby pasowały do poprzeczek wychodzących z konstrukcji skrzydła. Oryginalnie miały sięgać do wręgi WC1, ale tę jej część usunąłem. Wspomniane poprzeczki (zaznaczone na zdjęciach) imitują to jak było to w rzeczywistości. Imitują, bo ciężko było mi odczytać ze zdjęć jak dokładnie to wyglądało. | The legs are designed well, it's a relatively simple construction. At this stage, a few elements are still missing, such as "scissors", but I will complete them during the final assembly. The number of elements that remain after attaching the undercarriage may introduce some confusion. Most of them are duplicated. In the case of using a laser cut set, some elements are even quadruple. For example, G19 parts appear twice in the cutout, double among the additional laser set (cardboard about 0.3 mm thickness, this set includes a lot of details) and twice on a 1 mm cardboard with a framework laser-cut set. A bit like assembling furniture yourself, there will always be unused screws or washers. The legs had to be slightly modified to match the remakes in the wings - I had to increase the height of the G9 elements and shorten the G19 to fit the crossbars coming out of the wing structure. Originally they were supposed to reach the WC1 frame, but I removed this part. The aforementioned crossbars (marked in the photos) imitate what it was like in reality. They imitate because it was difficult for me to read from the photos what exactly it looked like. |
.jpg)
%20(1).jpg)
%20(1).jpg)
| Klejąc hak trafiłem na błąd w numeracji elementów - hak
składa się z części A38, A39 i A40, tak samo jak pierścień będący podstawą dla
zamocowania silnika. Kółko ogonowe jest stosunkowo prostym zespołem, niestety i
tutaj wkradł się błąd - pokrywa cz. G45 jest niebieska, powinna być w kolorze
szarym tak jak spód kadłuba. Ten błąd można poprawić wykorzystując zapas koloru
pobrany np. ze steru wysokości czy lotek. | Building the tailhook, I found a mistake in the numbering of elements - the hook consists of parts A38, A39 and A40, as well as the ring that is the basis for mounting the engine. The tail wheel is relatively simple, unfortunately, there is also a mistake - the cover part G45 is blue, it should be grey like the underside of the fuselage. This error can be corrected by using a spare colour obtained e.g. from the elevator or ailerons. |
.jpg)
.jpg)
.jpg)
.jpg)
.jpg)
.jpg)
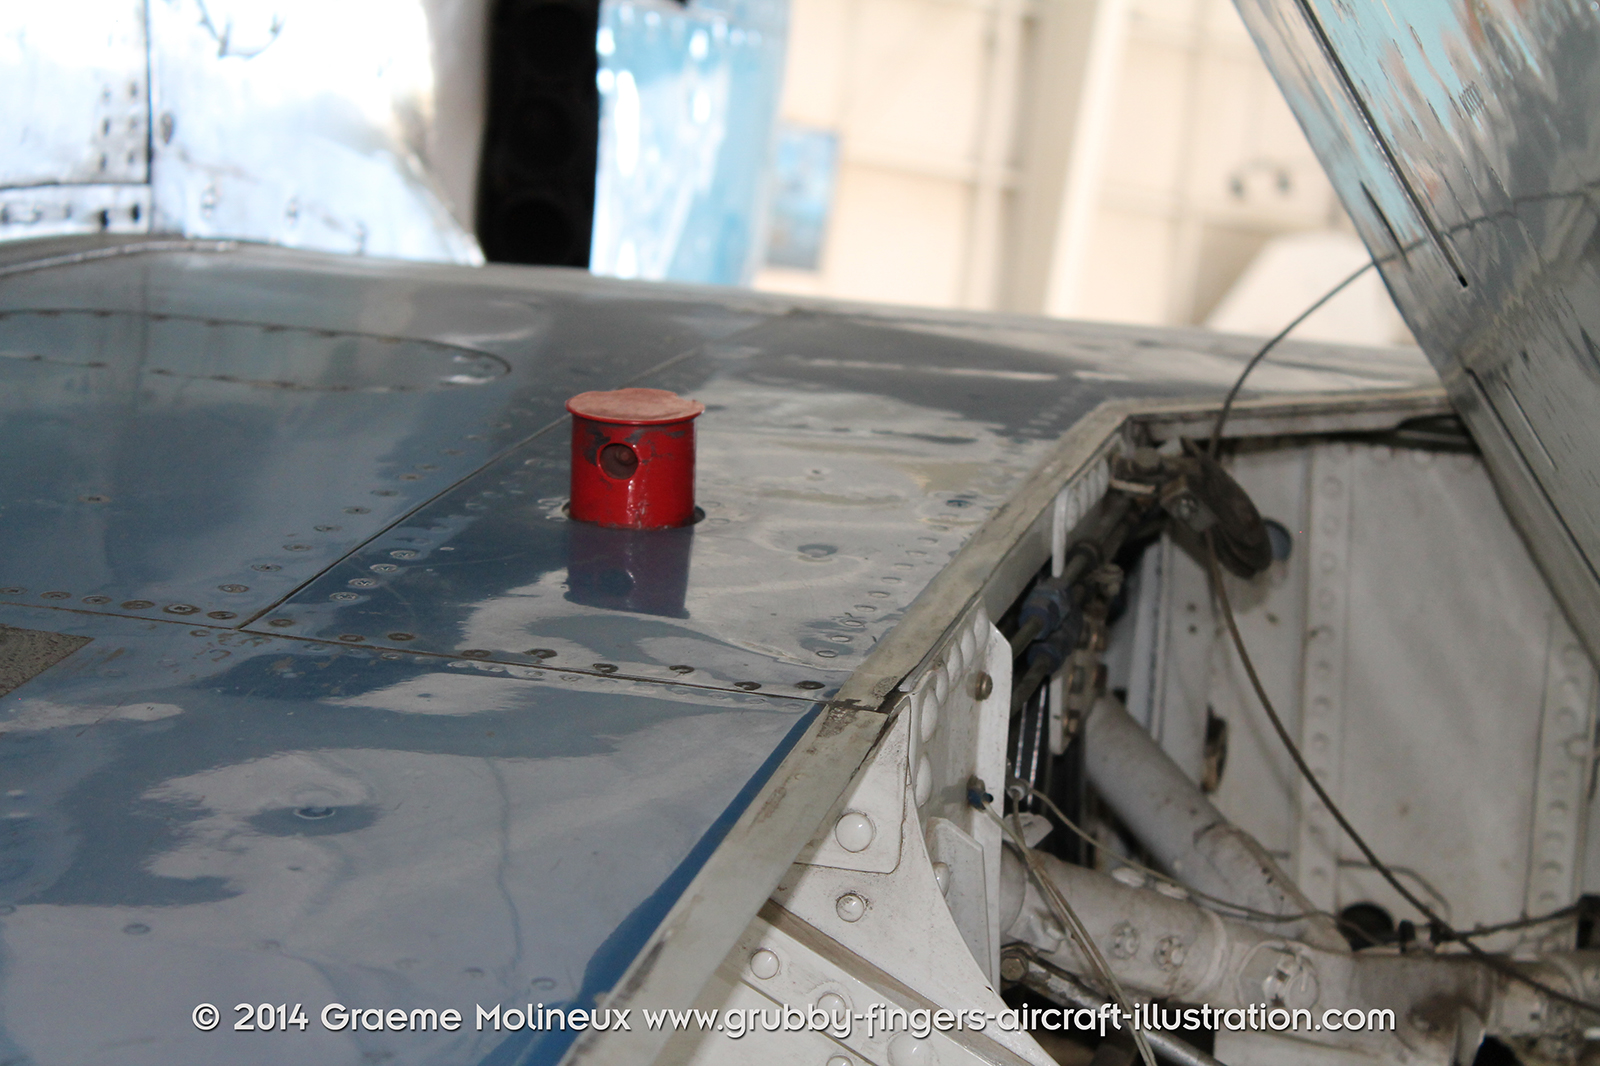
| Nadszedł czas montażu stałych fragmentów skrzydeł do kadłuba. Podobnie jak w przypadku stateczników poziomych trzeba je bardzo starannie dokleić, bo nie ma elementów przejścia kadłub-skrzydło. Gotowe golenie zamontowałem od razu w komorach podwozia. Irytuje trochę brak rysunku montażowego pokazującego dokładnie geometrię podwozia - rzut z przodu, rzut z boku. Golenie ustawiłem posługując się planami znalezionymi w Internecie, np. tym zdjęciem. Na podstawie min. tego zdjęcia dodałem kartonowy smaczek w postaci tego czerwonego elementu na górnej powierzchni skrzydła. Jak przypuszczam, jest to wskaźnik potwierdzający, że podwozie jest wypuszczone i zablokowane w tej pozycji. Widziałem już podobne wskaźniki w innych samolotach z tego okresu. | The time has come to attach the unfoldable wing parts to the fuselage. As in the case of horizontal stabilizers, they need to be attached very carefully, because there are no fuselage-wing transition elements. I installed the ready-made undercarriage legs immediately in the hatches. A little irritating is the lack of an assembly drawing showing the exact geometry of the chassis - front view, side view. I set the geometry using the plans found on the Internet or with this photo. I added also some extras: based on this photo I added this little red thing on the upper surface of the wing. This is an indicator, I suppose, that shows the landing gear is extended and locked in that position. I have already seen similar indicators on other planes from this period. |
.jpg)
.jpg)
.jpg)
.jpg)
.jpg)
.jpg)
.jpg)
.jpg)
| Ruchome części skrzydeł na razie nie są połączone na stałe. Zrobię to na samym końcu, bo na razie będą zwyczajnie przeszkadzać podczas wykonywania pozostałych do końca prac. Podsumowując ten etap - na plus zaliczam sobie to, że udało mi się ten projekt zrealizować, nie cisnąłem tego w kąt i mimo wielu problemów osiągnąłem cel. Z czego jestem bardzo zadowolony - skrzydła, tak jak je widzicie teraz na zdjęciach trzymają się na sucho, bez kleju na dwóch zawiasach oraz punkcie zaczepienia - tak jak było to w prawdziwym samolocie. Jest to całkiem stabilna konstrukcja. Na minus - trochę przekombinowałem z malowaniem, powłoka nie wyszła jednolita, ogólnie malowanie jest jeszcze obszarem nad którym musze popracować. Mogłem lepiej dopracować niektóre elementy, niektóre z nich przerabiałem wiele razy i przez to wymęczyłem. Co by nie było, dobrze się przy tym wszystkim bawiłem i jestem z efektu zadowolony. I to jest najważniejsze. | The foldable parts of the wings are not permanently connected at the moment, I will do it at the very end because for now, they will simply interfere with the rest of the work. Summarizing this stage - I count on the plus side that I managed to implement this project, I did not throw it to waste and despite many problems, I achieved my goal. I am very happy with the wings, as you can see them now in the pictures, they are attached, without any glue on the two hinges and on the point of attachment - just like in a real plane. It is quite a stable structure. On the downside - I did some mistakes in painting and the paint coating did not come out uniform. Generally, painting is still an area that I have to work on. I was able to refine some elements better, some of them I reworked many times and thus they look not really nice. Whatever the case, I had a lot of fun with it and I'm happy with the result. This is the most important thing. |
.jpg)
.jpg)
.jpg)
.jpg)
.jpg)
.jpg)
.jpg)
.jpg)
.jpg)
.jpg)
.jpg)
.jpg)
.jpg)
.jpg)
.jpg)
.jpg)
.jpg)
Brak komentarzy:
Prześlij komentarz