
| Witam w Nowym Roku! W dzisiejszym odcinku pokażę Wam jak powstały skrzydła do modelu samolotu MiG-23 M. | Happy New Year! In today's episode, I will show you how I built the wings for the model of MiG-23 M. |

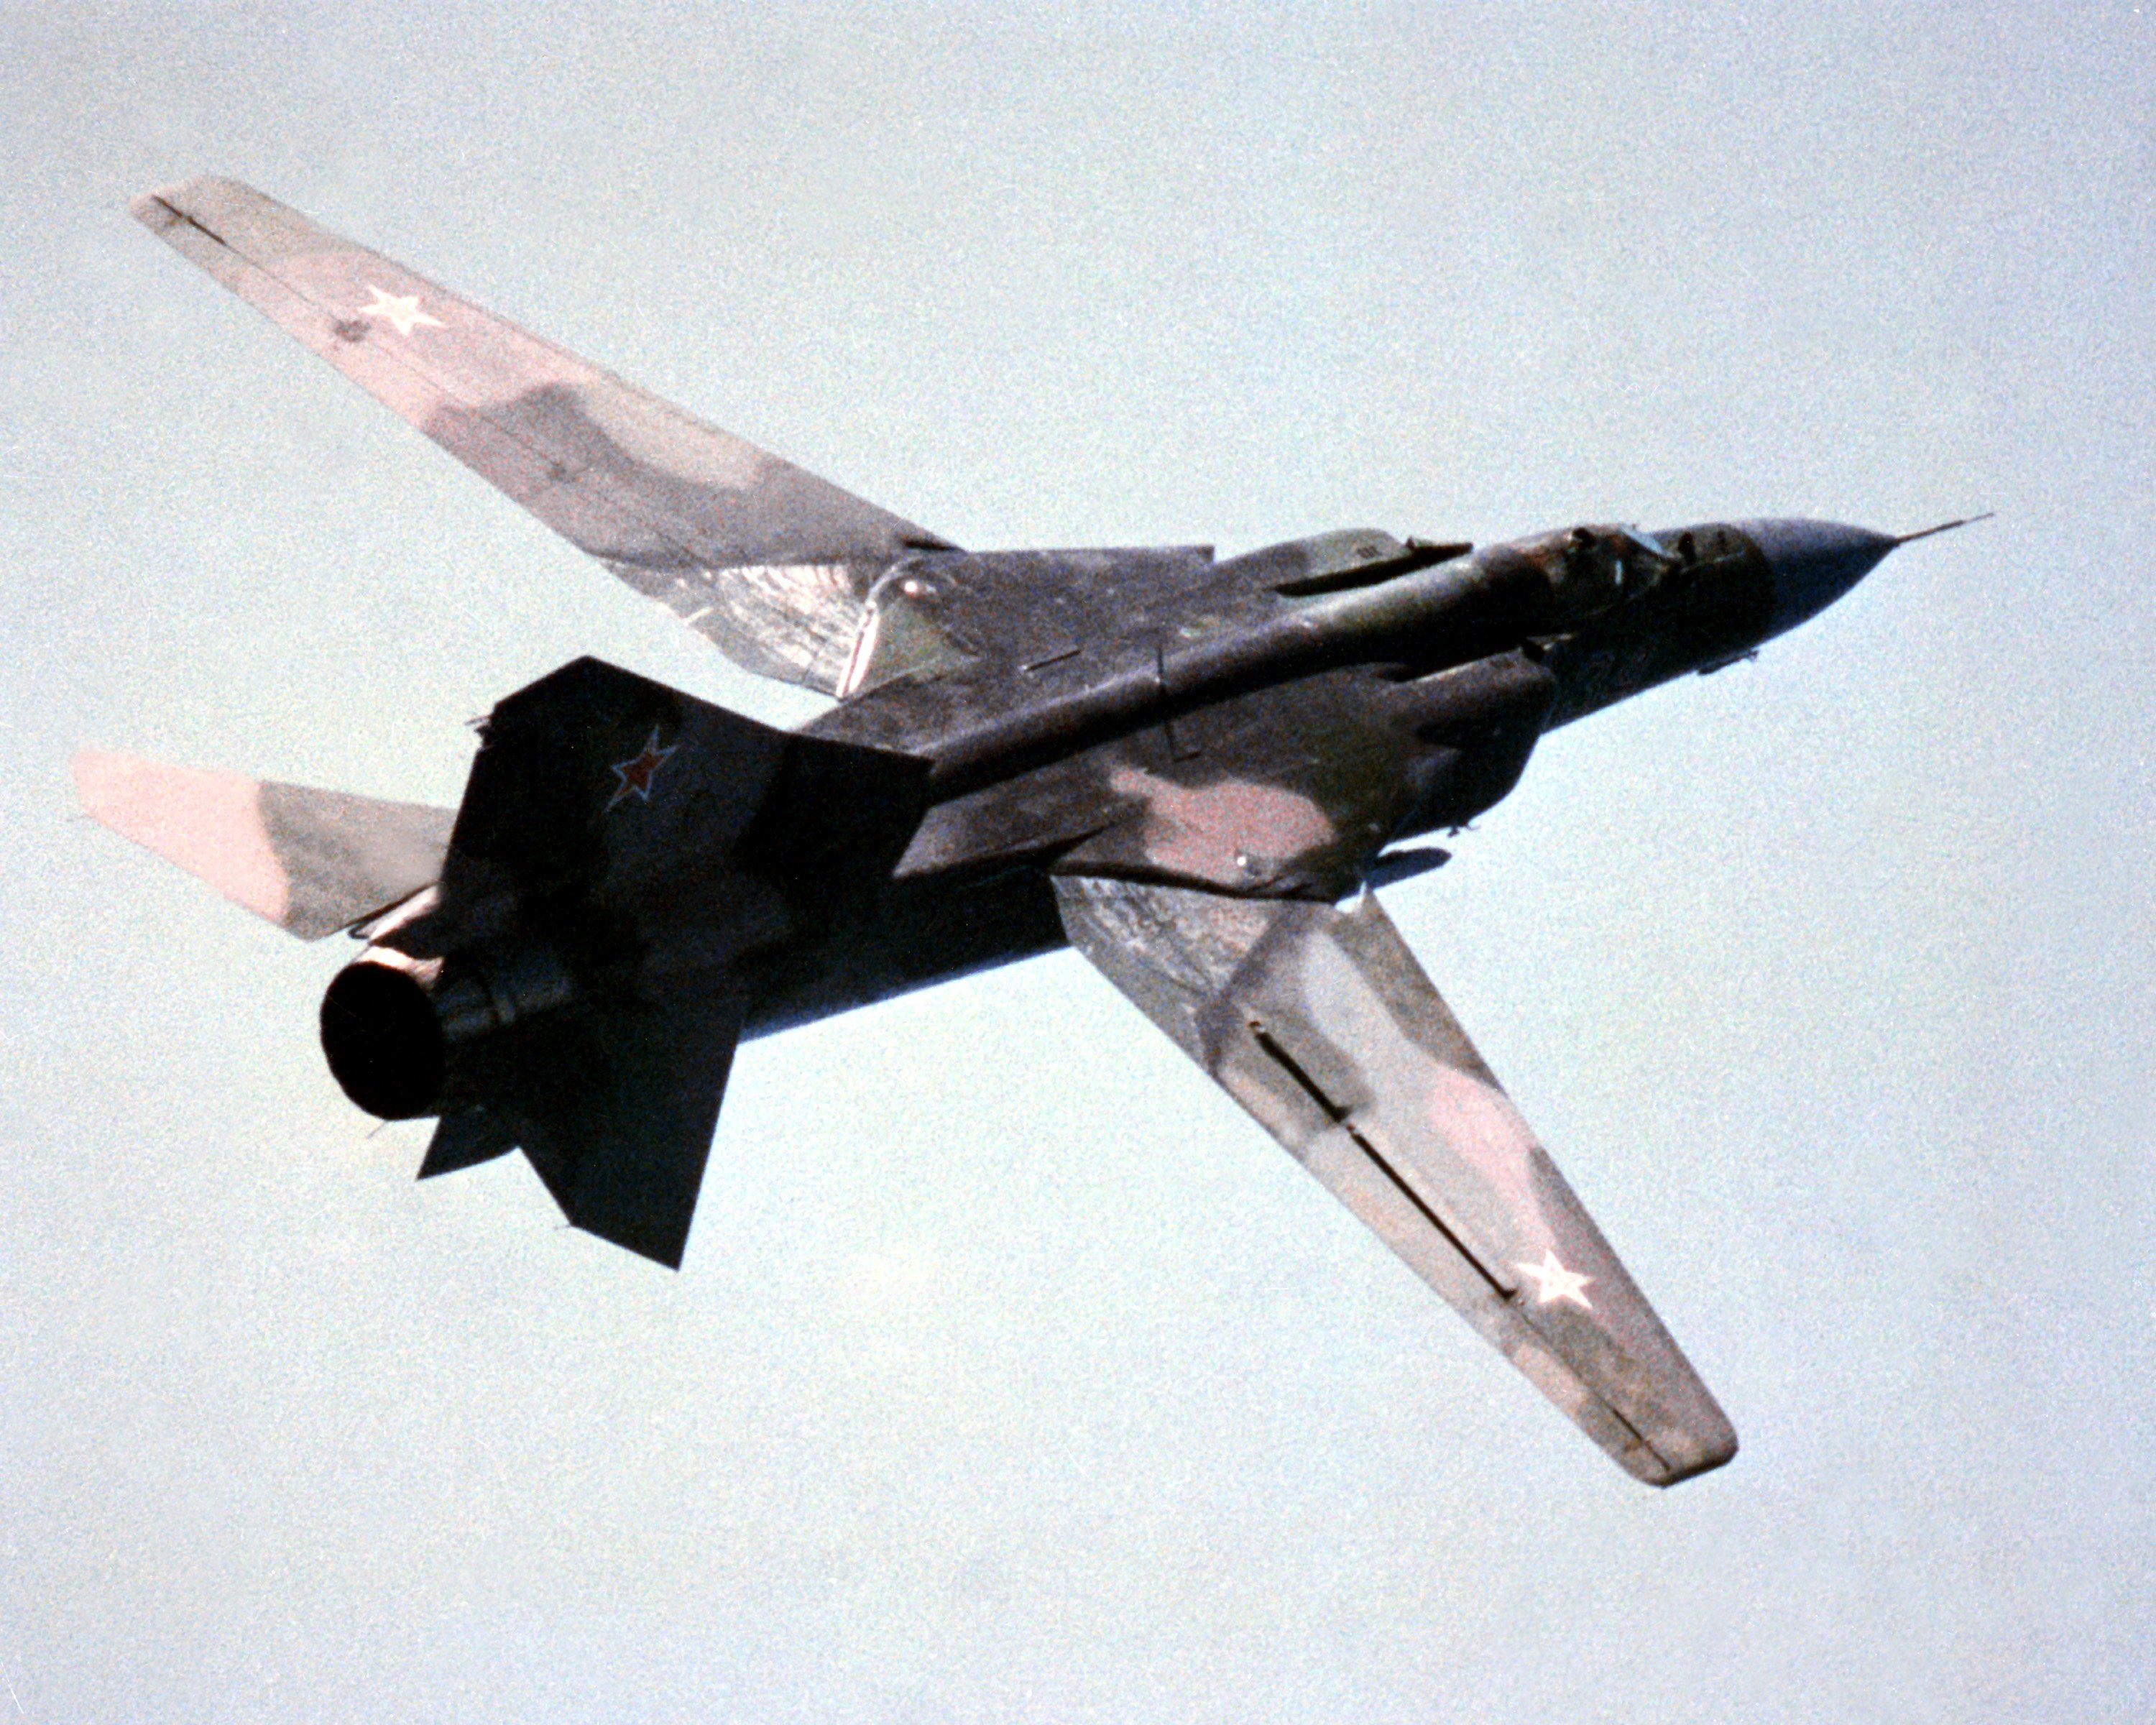
| Na początek trochę ciekawostek na ich temat. Poza tym, że są to skrzydła o zmiennej geometrii wartym podkreślenia jest także to, że nie posiadały lotek. Ich funkcje przejęły płytowe stery wysokości, które mogły wychylać się także naprzemiennie. Instrukcja budowy modelu błędnie mówi o sklejeniu klap i lotek, ale właściwie są tam tylko klapy. Oprócz nich skrzydła były wyposażone w sloty na krawędzi natarcia (je też można wykonać je oddzielne) oraz przerywacze na górnych powierzchniach (inaczej interceptory lub spojlery, jak zwał tak zwał, projekt modelu ich nie przewiduje). Te ostatnie zastępowały w pewnym sensie lotki, znajdowały się na górnych powierzchniach skrzydeł. Działały różnicowo, więc wychylały się albo po lewej, albo po prawej stronie. Widać je na tym zdjęciu, na prawym skrzydle. Skrzydła mogły być ustawione w trzech różnych konfiguracjach. Pierwsza to 16 stopni, w tym ustawieniu skrzydła są "rozłożone", a samolot ma rozpiętość prawie 14 metrów. Konfiguracja ta była używana np. podczas startu i lądowania. W tym ustawieniu możliwe było także wypuszczenie klap, w pozostałych były one zablokowane. Drugą możliwością było ustawienie skrzydeł pod kątem 45 stopni (podczas lotu/manewrów), a trzecią 72. W tej ostatniej samolot miał rozpiętość 7,8 metra i mógł lecieć z maksymalną prędkością (2,35 Ma=2446km/h). | First, some interesting facts about the wings. Apart from the fact that they are variable-sweep wings, it is also worth emphasizing that they did not have ailerons. Their functions were taken over by stabilators, which are a fully movable aircraft stabilizers (also called the all-moving tail). The model building instructions incorrectly say about the flaps and ailerons, but actually, only the flaps are there. In addition to them, the wings were equipped with slots on the leading edge (they can also be made separately in the model) and interceptors on the upper surfaces (or spoilers, as they are called, the design of the model does not provide for them). Interceptors replacing here ailerons. They worked alternately, so they opened either on the left or on the right. You can see them in this photo on the right wing. The wings could be set in three different configurations. The first is 16 degrees, in this setting, the wings are "unfolded" and the plane has a span of almost 14 meters. This configuration was used, for example, during take-off and landing. In this configuration, it was also possible to extend the flaps, while in the others they were blocked. The second option was to set the wings at an angle of 45 degrees, and the third - 72 degrees. In the last one, the plane had a wingspan of 7.8 meters and could fly at maximum speed (2.35 Ma = 2446 km / h). |

| Przejdźmy zatem do aspektów kartonowo-modelarskich.
Dopatrzyłem się na tym etapie trzech błędów - oba skrzydła mają czerwone lampki
pozycyjne, oczywiście tylko ta po lewej powinna być w tym kolorze, prawa musi
być zielona. Druga sprawa to drobiazg, który wprowadza delikatne zamieszanie -
części szkieletu w47 i w48 (L i P) pojawiają się w modelu dwukrotnie, raz w
szkielecie skrzydeł a drugi raz przy nasadach stateczników poziomych. Elementy
skrzydeł są oznaczone właściwie, a elementy stateczników powinny nosić
oznaczenie w64 i w65 (L i P). Tak wynika z rysunków montażowych. Trzecia to
brak nadrukowanego łuku na klapie cz. 47 (L i P). Czym ten łuk jest i dlaczego
jest to takie istotne wyjaśniam kilka akapitów dalej. | So let's move on to the cardboard and modelling aspects. At this stage, I noticed three mistakes in design - both wings have red position lights, of course, only the one on the left should be that colour, the right one must be green. The second thing is a trifle that introduces a slight confusion - parts of the w47 and w48 (L and R) skeleton appear in the model twice, once in the wing skeleton and the second time at the base of the horizontal stabilizers. Wing elements are correctly marked and horizontal stabilizers elements should be marked w64 and w65 (L and R). This is shown in the assembly drawings. The third is the lack of a printed arc on the flap, part 47 (L and R). What this arc is and why it is so important I explain a few paragraphs later. |

| Szkielet skrzydeł jest nieco ubogi, moim zdaniem
wykonany w standardzie nie zapewni wystarczającego oparcia dla poszycia.
Zauważyłem to już przy nieudanej budowie MiGa-23 MF. Wyposażyłem szkielet we
wzmocnienia z tektury 1 mm i odpowiednio go wyszlifowałem. Na ruchomą
powierzchnię, która wchodzi w szczelinę w kadłubie nakleiłem z obu stron śliską
taśmę klejącą. Dzięki temu zmniejszyłem tarcie podczas składania i rozkładania
skrzydeł. Poszycie skrzydeł wzmocniłem podklejkami wklejonymi w uformowane już
elementy na butapren. Wypuściłem sobie z nich paski łączące w miejscach gdzie
na krawędzi natarcia jest ten charakterystyczny "ząb". Autor nie
przewidział w tym miejscu pasków łączących dla dwóch elementów, które ten
"ząb" tworzą. Nie wiem jak miałyby one być wklejone na styk, ciężko
to widzę. Dzięki temu, że wypuściłem spod spodu kawałek podklejki, elementy te
miały się na czym oprzeć i ich montaż poszedł gładko. Nie do końca
satysfakcjonują mnie końcówki skrzydeł, ale nie ma też dramatu. Lampki pozycyjne zrobiłem z kropelek kleju introligatorskiego oraz poprawiłem
kolory świateł na właściwe. | The framework of the wings is a bit poor, in my opinion, made as standard, it will not provide sufficient support for the skin. I noticed it already with the unsuccessful construction of the MiG-23 MF. I equipped the framework with reinforcements made of 1 mm cardboard and sanded it properly. On the moveable surface that fits into the fuselage slot, I put a slick adhesive tape on both sides. Thanks to this, I reduced the friction when folding and unfolding the wings. I reinforced the sheathing of the wings with underlays glued with a butaprene glue to the already formed elements. I made the connecting strips in places where is the characteristic "tooth" on the leading edge. The author did not provide for the connecting strips for the two elements that make up this "tooth". I don't know how they should be glued without connecting strips. Thanks to this little improvement, I could stick these elements to something stabile and their assembly went smooth. I'm not entirely satisfied with the wingtips, but there's no drama either. I made the position lights from the droplets of bookbinding glue and corrected the colors of the lights to the correct ones. |


| Sklejenie klap było właściwie czystą formalnością,
wszystko pasowało idealnie. Problemem okazał się brak wyżej wspomnianego łuku
na częściach 47 (L i P). Początkowo odrysowałem go sobie ołówkiem, ale to był
kiepski pomysł, a na dodatek zrobiłem to odwrotnie. Zacząłem szukać zdjęć i
najlepsze jakie znalazłem to zdjęcie wymontowanego skrzydła. Nie mam pojęcia jaką dokładnie funkcję pełniła
ta blacha, ale podejrzewam, że wewnątrz kadłuba mogła być umieszczona rolka,
która jechała po tym kawałku metalu. Na wielu zdjęciach MiG-a w locie widać też
zabrudzenia i otarcia powstałe od składania i rozkładania skrzydeł na
powierzchni, która chowała się w kadłubie. Domniemam, że te elementy musiały
być jakoś smarowane i stąd pojawiły się zabrudzenia. Podejrzewam też, że
krawędzie szczeliny, w którą chowają się skrzydła są wyposażone w jakieś
fartuchy albo szczotki Niestety nie mam żadnych źródeł, które mogłyby to
potwierdzić i są to tylko moje przypuszczenia. Kilka przykładowych zdjęć: | Gluing the flaps was actually a pure formality, everything fit perfectly. The problem was the lack of the above-mentioned "arc" on parts 47 (L and P). Initially, I drew it with a pencil, but it was a bad idea and I did the opposite. I started looking for photos and the best one I found was this photo of demounted wing. I have no idea what the exact function of this metal sheet was, but I suspect that inside the fuselage there might have been a roller that ran over this piece of metal. Many photos of the MiG in flight also show dirt and abrasions caused by folding and unfolding the wings on the surface that was hidden in the fuselage. I suppose that these elements had to be lubricated somehow and hence the dirt appeared. I also suspect that the edges of the slot in which the wings hide are equipped with some brushes. Unfortunately, I have no sources that could confirm this and these are only my assumptions. Some sample photos: |


Przejrzałem też kilka relacji z budowy modeli
plastikowych MiG-a-23 i zauważyłem, że większość modelarzy wykonała w tym
miejscu cieniowanie i łukowate zabrudzenia. Pewną inspiracją dla mnie było też
zdjęcie modelu F-14 z książki Diego Quijano "Encyclopedia of aircraft modellng techniques 4 - weathering", w której znalazłem kilka wskazówek jak się do
tego zabrać. Swoją drogą w F-14 i innych konstrukcjach ze skrzydłami o zmiennej
geometrii też występują takie otarcia - tutaj przykładowe zdjęcie F-14. | I also reviewed several reports from the construction of MiG-a-23 plastic models and noticed that most modellers made shading and arched dirt in this place. Some inspiration for me was also a photo of the F-14 model from the book written by Diego Quijano "Encyclopedia of aircraft modelling techniques 4 - weathering", in which I found some tips on how to go about it. By the way, the F-14 and other constructions with variable geometry wings also experience such abrasions: here the sample foto of F-14. |


| Tak jak wspomniałem na początku, na poszyciu
skrzydeł (na klapie, którą trzeba odciąć jeśli robimy je oddzielne) jest
nadrukowane miejsce, w którym powinna być przymocowana ta łukowata blacha. Co
ciekawe nie ma go już na elemencie potrzebnym do wykonania oddzielnej klapy.
Wyciąłem sobie ten fragment z tego, co odciąłem od skrzydła, pomalowałem farbą
"gunmetal" i nakleiłem na
sklejoną klapę. Czynność tę powtórzyłem na drugiej spodzie oraz na klapie po
drugiej stronie. Kolejnym krokiem było wykonanie zabrudzeń. Zdecydowałem się na
suchą pastelę nakładaną pędzelkiem. Odgrodziłem sobie obszar, który miał być
zabrudzony taśmą ochronną i pokryłem go warstwą proszku z mieszanki startych
pasteli. Następnie przy pomocy patyczka higienicznego, którym parę dni wcześniej
nakładałem butapren (ważne, żeby klej był suchy) zacząłem łukowatymi ruchami
czyścić tę powierzchnie. Patyczek bez problemu ściągał naniesiony proszek w
miejscach w których go używałem. Im dalej na zewnątrz, tym mocniej nim
polerowałem (żeby uzyskać efekt zanikania w kierunku zewnętrznym). Początkowo
byłem nieco przerażony, ale po odpowiedniej obróbce patyczkiem czyszczącym
osiągnąłem zadowalający efekt. Musiałem go od razu utrwalić lakierem, bo w przeciwnym razie
mógłbym przypadkiem dotknąć tę powierzchnię palcem i roznieść brud tam gdzie go
nie powinno być. | As I mentioned at the beginning, on the wings skin there is a printed place where this arched metal sheet should be attached. Interestingly, this part of the skin needs to be cut off if we make flaps separate. This arched part is no longer on the element needed to make a separate flap. I cut this fragment out of what I cut off from the wing, painted it with gunmetal paint and stuck it on the glued flap. I repeated this operation on the other side and on the flap on the other side. The next step was to make the dirt. I decided to use a dry pastel applied with a brush. I fenced off the area to be soiled with the protective tape and covered it with a layer of powder from a mixture of grated pastels. Then, with the help of a cotton swab with which I applied butaprene a few days earlier (it is important that the glue is dry), I started to clean the surface with arched movements. The stick easily removed the applied powder in the places where I used it. The farther to the outside, the harder I polished it (to get the effect of fading outwards). At first, I was a bit scared, but after proper treatment with a cleaning stick, I achieved a satisfactory result. I had to fix it with varnish right away, otherwise, I could touch the surface with my finger by accident and spread the dirt where it shouldn't be. |


| Nadszedł długo wyczekiwany moment - montaż skrzydeł.
Przygotowałem sobie takie dwie pinezki, będące nawiniętymi na drut 1 mm
kawałkami papieru z doklejonymi od góry główkami. Dwa krążki widoczne obok
dokleiłem od spodu "pinezek" po zamontowaniu skrzydeł. Zanim jednak
to nastąpiło dokonałem jeszcze jednej kosmetycznej zmiany wewnątrz - nakleiłem
na zęby zębatki takie małe kosteczki z kartonu 0,8 mm. Zębatka zdawała się być
za mała i zęby na skrzydłach się z niej czasami wyhaczały. Poniżej zamieszczam
filmik, na którym widać jak pracuje mechanizm. | The long-awaited moment has come - assembly of the wings. I prepared for myself two pins, which are pieces of paper wound on the wire 1 mm with heads glued on top. I glued the two discs to the bottom of the "pins" after installing the wings. Before that happened, I made one more cosmetic change inside - I glued small cubes of 0.8 mm cardboard onto the teeth of the racks. The rack seemed to be too small and the teeth on the wings would sometimes stick out of it. Below is a video showing how the mechanism works. |


| Teraz, kiedy skrzydła były już na miejscu mogłem
dokleić poszycie grzbietu i przednią część kadłuba. Poszycie to odpowiednio
uformowałem i oczywiście wzmocniłem podklejką. Nie chciałem powtórki z
poprzedniego podejścia do budowy MiG-a-23, który na tym etapie (po zapadnięciu
się poszycia grzbietu) poleciał do śmietnika. Akcja została zakończona
sukcesem, choć uważam, że te zagięcia na wewnętrznych krawędziach elementu 51 (osłaniające
szczeliny, w które wchodzą skrzydła) za dość trudne do przyklejenia. Z tym
namęczyłem się najbardziej. Ciąg dalszy nastąpi! | Now that the wings were in place, I was able to glue the upper skin and the front of the fuselage. I shaped it properly and of course strengthened it with an extra layer glued with butaprene. I did not want to repeat the previous approach to the construction of the MiG-23, which at this stage (after the skin in the upper part of fuselage collapsed) flew to the garbage can. This time action was successful, although I found the bends on the inner edges of part 51 (covering the gaps into which the wings enter) quite difficult to form. This is what I was tired of the most. To be continued! |


Ten komentarz został usunięty przez autora.
OdpowiedzUsuń