
| Prawidłowe uformowanie łopat śmigła rzutuje na wygląd całego modelu. Oddanie ich aerodynamicznego kształtu nie jest łatwe. Przygotowałem krótki poradnik wyjaśniający proces budowy łopat oraz ich osadzenia w kołpaku. Klejąc śmigła dla modelu Bf-110 zrobiłem kilka zdjęć ilustrujących kolejne etapy ich powstawania. | The correct forming of propeller blades affects the appearance of the entire model. Giving their aerodynamic shape is not easy. I have prepared a short tutorial explaining the process of building blades and their seating in the propeller hub/spinner. Making the propellers for the Bf-110 model, I took several photos illustrating the subsequent stages of the build. |

| Wycięte elementy łopat śmigieł należy w pierwszej kolejności sfazować na krawędziach. Chodzi o to by miejsce łączenia przedniej i tylnej części było jak najcieńsze. Szlifując od wewnątrz krawędzie elementu należy uważać, żeby nie przetrzeć za mocno i nie zaburzyć w ten sposób kształtu elementu. Następnie elementy trzeba wyretuszować odpowiednio dobranym kolorem. | The cut-out propeller blades elements should first be chamfered at the edges. The point is to make the connection between the front and back as thin as possible. When sanding the edges of the element from the inside, be careful not to sand it too hard and thus not distort the shape of the element. Then the elements need to be retouched with the right colour. |

| Przygotowuje sobie druty, owinięte ciasno zwiniętym w rulon papierem przygotowanym według poniższego szablonu. Dzięki takiemu rozwiązaniu rulon jest ma większą średnicę u nasady i zwęża się stopniowo ku górze. Wysokość i średnicę zwijki dostosowujemy odpowiednio do wielkości łopaty. | I prepare wires, I wrap them tightly rolled paper prepared according to the template below. Thanks to this solution, the roll is larger in diameter and narrows gradually upwards. The height and diameter of the paper wrap are adjusted to the propeller's blade size. |

| Przechodzimy do formowania. Potrzebne będą - duża gumka do gumowania, metalowe pręty o różnych średnicach (używam dwa, 0,5 cm oraz 0,2 cm), klej BCG. Element smaruję klejem i formuje na gumce przy użyciu pręta. Ustawiam pręt pod skosem, tak aby nadać łopacie charakterystyczne skręcenie. Istotna jest uformowanie przedniej i tylnej części w taki sposób by do siebie pasowały, oraz to, żeby uzyskać powtarzalność na wszystkich łopatach. | We proceed to form. You will need - a large rubber band, metal rods of various diameters (I use two, 0.5 cm and 0.2 cm), BCG (Brand Clear Glue, a water glue). I put a little bit of glue on the part and I form it on an elastic band using a metal rod. I set the rod at an angle to give the blade a characteristic twist. It is important to shape the front and back so that they fit together and to achieve repeatability on all blades. |


| U nasady używam drutu o mniejszej średnicy: | At the bottom (or base) I use a wire with a smaller diameter: |


| Uformowane elementy osadzam na wcześniej przygotowanych drutach. Przyklejam najpierw przednią część łopaty, potem tylną kontrolując na bieżąco jej skręcenie. | I place the formed elements on previously prepared wires with wrapped paper. First I glue the front part of the blade, then the back, checking its twist all the time. |

| Po wyschnięciu łopatę należy ocenić czy trzeba jeszcze przeszlifować krawędzie/miejsca styku tylnej i przedniej części. Jeśli tak, potrzebne będą jeszcze poprawki retuszu. | After drying, the blades should be sanded on the edges/places of joining of the back and front. If so, retouching corrections will still be needed. |

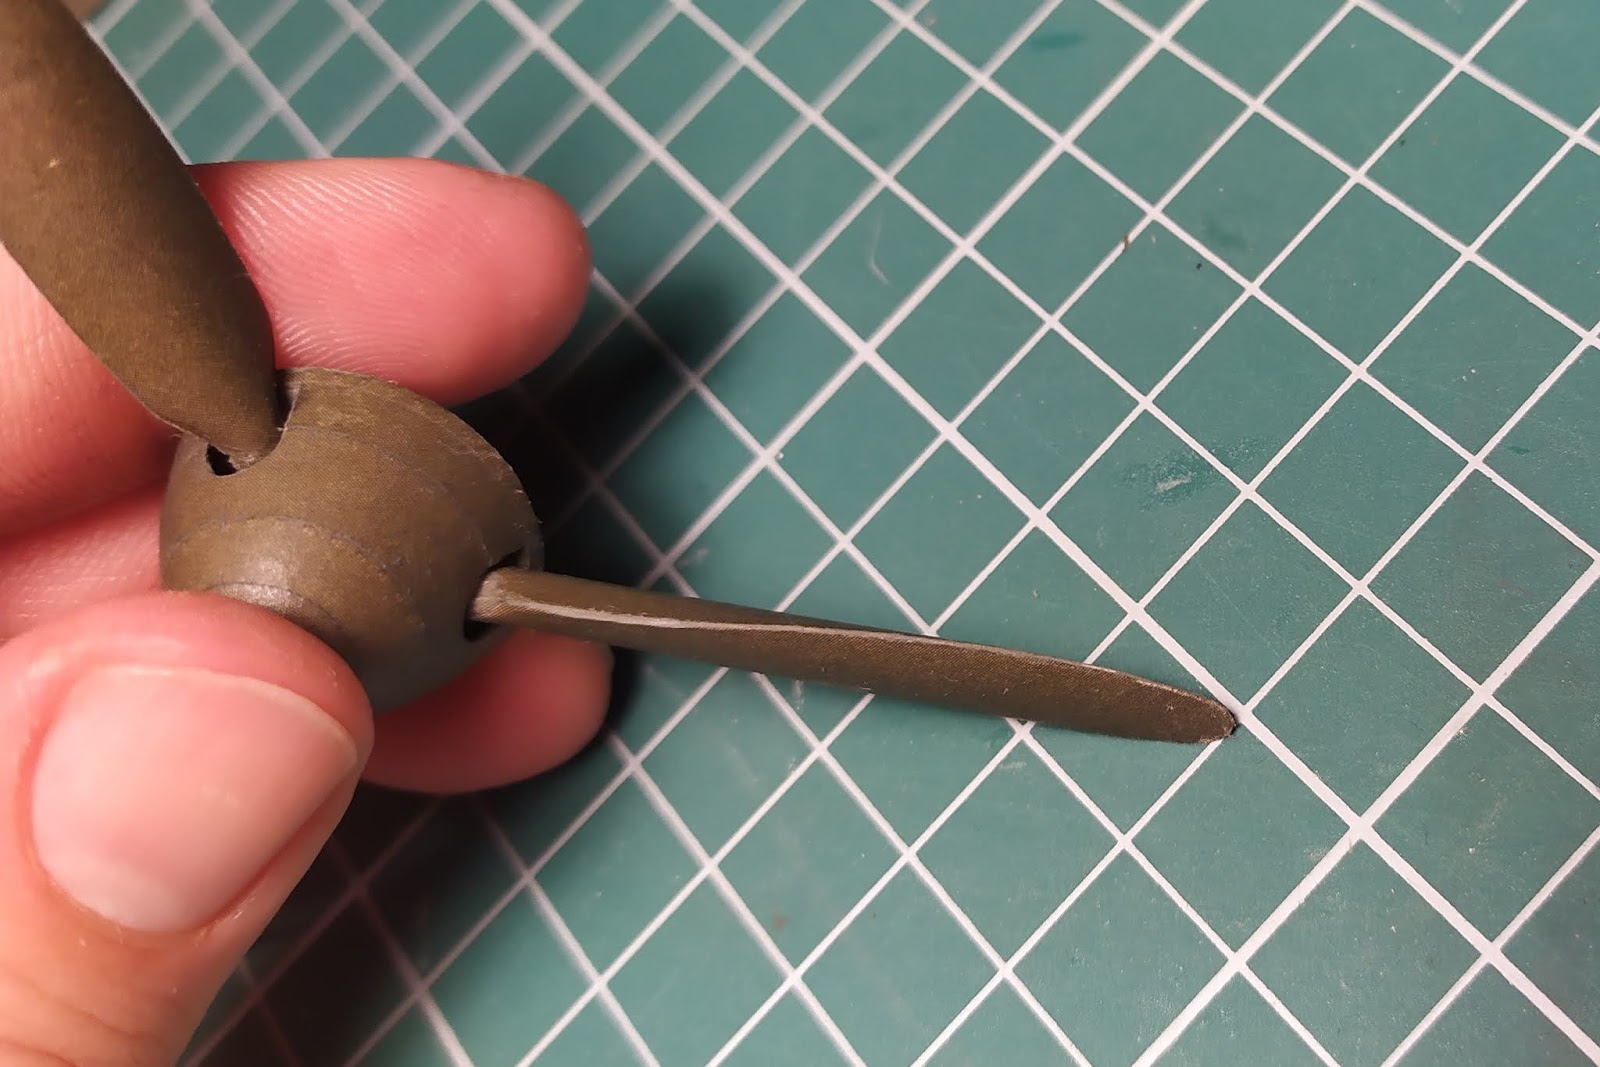
| Łopaty należy osadzić w odpowiedni sposób w przygotowanych miejscach w kołpaku. Wklejam je przy użyciu kleju cyjanoakrylowego. Należy pamiętać o tym, że każda z nich musi być ustawiona tak samo. W zależności od ilości łopat należy pamiętać o zachowaniu odpowiedniego kąta pomiędzy nimi. W przypadku śmigła dwu lub czterołopatowego sprawa jest prosta. Tutaj mamy do czynienia ze śmigłem trójłopatowym, w którym kąt pomiędzy łopatami wynosi 120 stopni. Dla zachowania prawidłowej geometrii przygotowałem sobie proste, ale skuteczne narzędzie. Na przeźroczystej folii rozrysowałem sobie wzór z odpowiednim rozstawem dla śmigła trójłopatowego. | The blades should be placed properly in the prepared places in the propeller hub/spinner. I put them using cyanoacrylate glue (superglue). Remember that each of them must be set the same. Depending on the number of blades, remember to keep the right angle between them. For a two- or four-blade propeller, the matter is simple. Here we are dealing with a three-blade propeller, in which the angle between the blades is 120 degrees. To maintain the correct geometry, I have prepared a simple but effective tool. On a transparent film, I have drawn a pattern with the appropriate spacing for a three-blade propeller. |


| Efekt końcowy: | Final effect: |


Dziękuję za ten tutorial. Bardzo mi pomógł przy budowie śmigła w Bf109K.
OdpowiedzUsuńCieszę się, że się przydał!! Powodzenia przy kolejnych modelach!
Usuń