
| Witam w nowej relacji z budowy! Myślę, że dla tych z Was, którzy znają moje modelarskie i lotnicze upodobania wybór tematu może być nieco zaskakujący. Kania to samolot trochę nie z mojej bajki, dlatego relacja nie zaczyna się od sformułowań typu "od zawsze chciałem mieć go w kolekcji" czy "legendarny samolot, pozycja obowiązkowa na półce". Cywilne maszyny po prostu nigdy nie budziły we mnie tyle zainteresowania, co wojskowe. Nie znaczy to oczywiście, że samolot mi się nie podoba. Choć w tym przypadku bardziej niż jego sylwetka czy historia skłoniła mnie do jego budowy inna, nowatorska metoda projektu modelu. Możecie pomyśleć, że po Bf-110 rzuciłem się na coś prostego, żeby wypocząć po trudnym modelu jakim był niewątpliwie Messerschmitt. Ten niewielki samolot model może się na pierwszy rzut oka wydawać łatwy, ale zapewniam Was, że pozory w tym wypadku mylą i poprzeczka jest zawieszona wysoko. Wycinankę otrzymałem w prezencie od Wojciecha Pietrzykowskiego, jednego z dwóch autorów opracowania - drugim jest Piotr Siewierski. Przyjmując model obiecałem, że w ciągu najbliższego roku się za niego zabiorę. A zatem skalpel w dłoń i do roboty! | Welcome to the new model build! I think that for those of you who know my scale modelling and aviation preferences, the choice of topic may be a bit surprising because this is not my cup of tea. Therefore my post doesn't start with phrases such as "I've always wanted to have it in the collection" or "a legendary plane, a must-have item on the shelf." Civilian planes have never interested me so much as military ones. This does not mean, of course, that I do not like this plane. Although in this case, I was prompted to build it not because of its silhouette or history, but more because of another, innovative model design method. You might think that after the Bf-110 I wanted to do something simple, to relax after this difficult model. This small plane model may seem easy at first glance, but believe me, it will be a pretty high hurdle. It is very complicated and contains a lot of small parts. I got the model as a gift from Wojciech Pietrzykowski, one of the two designers - the second is Piotr Siewierski. By receiving the model, I promised that I would get on with it within the next year. So, let's get it started. |
| Jeżeli ktoś z Was siedzi teraz na kwarantannie i cierpi z tego powodu na nudę proponuję zabrać się za niniejszy model. Zajęcie, które wypełni Wam czas na długo to oddzielenie od siebie części do podklejenia na tekturę 0,5 mm i 1 mm - wszystkie znajdują się pomieszane na dwóch arkuszach (zaznaczyłem czerwonym i niebieskim, żeby było widać jak są przemieszane). Coś jakby oddzielanie kaszy od grochu. To będzie prawdopodobnie pierwsza relacja z budowy w historii, która nie zacznie się od zdjęcia wręg podklejonych na kartonie, tylko niepodklejonych posortowanych wręg rozłożonych na stole. Zdjęcie podklejonych na tekturę daruję już sobie. | If anyone of you is sitting in quarantine now and suffers from boredom because of it, I suggest that you take this model. There is a task that will fill your time for a long time - separating the parts to be glued onto 0.5 mm and 1 mm cardboard. They are all mixed up on two sheets (I marked red and blue so that you can see how they are mixed up). Something like separating grains of sand from peppercorns. This will probably be the first model build report in history, which will not start with the photo of frames glued on cardboard, but instead of it of one of the un-glued sorted frames laid out on the table. I'll spare you posting the photo of the frames glued on the cardboard. |


| Numeracja części odpowiada co do zasady kolejności klejenia, ale zanim wbijemy ostrze skalpela w część oznaczoną numerem 1 trzeba przygotować "do przodu" sporo innych elementów, t.j. podkleić odpowiednią grubością kartonu bądź tektury, tak żeby mieć je pod ręką gdy zacznie się formowanie kolejnych segmentów kadłuba. Ilość wariantów podklejania części jest spora, wierzę, że sukces zależy w dużej mierze od ścisłego przestrzegania grubości zaleconych przez autorów. Mamy tutaj np. elementy do podklejenia kartonem oznaczone symbolem "+", "++" oraz "+++" - ilość plusów odpowiada ilości warstw kartonu. Pomiędzy niektóre elementy do złożenia i sklejenia trzeba wkleić odpowiedniej grubości karton. | The numbering of the parts corresponds the order of building, but before you put the scalpel blade into the part marked with number 1, you have to prepare a lot of other elements in advance, i.e. glue them to the cardboard or paper of appropriate thickness, so that you have them on hand when it comes to forming the next segments of the fuselage. The number of variants of thickness is large, I believe that the final success depends largely on strict compliance with the thickness recommended by the authors. We have here, for example, elements for sticking with cardboard marked with "+", "++" and "+++" - the number of plusses corresponds the number of layers of the cardboard. |

| Niektóre wręgi kadłuba zaprojektowane są jako elementy do złożenia i sklejenia z kilku warstw kartonu. Zamiast je składać, rozciąłem je na osobne fragmenty i dopiero wtedy skleiłem. Przy niektórych zrobiłem sobie dodatkowe znaczniki, żeby wszystko wyszło równo. | Some fuselage frames are designed as elements for assembly and several layers of cardboard have to be glued together. Instead of folding them, I cut them into separate fragments and only then glued them. I made additional markers on some of them to make everything work equally. |


| Konstrukcja kadłuba Kani jest jak już wspomniałem we wstępie dość innowacyjna. Z pewnością odbiega od utartych szlaków, co wymaga ode mnie nieco innego podejścia do modelu. W prostych słowach, chodzi o to, że z każdego segmentu kadłuba wystaje z jednej strony rant długości 0,8 mm (będący wewnętrznym paskiem poszycia), a z drugiej strony pod zewnętrznym paskiem poszycia zostawione jest 0,8 mm miejsca na rant z kolejnego segmentu.Wyjątkiem jest element centralny, którego wewnętrzne poszycie wystaje po obu stronach. Dzięki takiemu rozwiązaniu łączymy kolejne segmenty wsuwając wystające poszycie wewnętrzne w miejsce pod poszyciem zewnętrznym kolejnego segmentu. Trzeba bardzo uważnie pozycjonować kolejne moduły, jest to kluczowe dla końcowego efektu. Dobrze obrazuje to poniższy rysunek z instrukcji (Rys.20). Swoją drogą, czapki z głów za rysunki montażowe, są proste, czytelne i co najważniejsze, dostarczają przydatne informacje. Wielu wydawców i autorów mogłoby wziąć przykład z tego modelu. | The design of the Kania fuselage is, as I mentioned in the introduction, quite innovative. This is not a typical construction, it requires a slightly different approach to the model. The point is that from each fuselage segment protrudes a 0.8 mm long edge on one side (being the inner plating strip), and on the other hand 0.8 mm of space is left under the outer plating strip from the next segment. The exception is the central module, whose internal sheathing protrudes on both sides. Thanks to this solution, we connect subsequent segments by sliding the protruding inner skin into place under the outer skin of the next segment. You need to position the next modules carefully, this is crucial for the final effect. This is well illustrated in the drawing below from the manual (Fig. 20). By the way, hats off for assembly drawings. They are simple, legible and most importantly, provide useful information. Many publishers and authors could take an example from this model. |


| Innym rozwiązaniem godnym pochwalenia jest brak krawędzi elementów poszycia. Wydrukowane są na szarym tle, nie ma czarnych konturów. To oczywiście utrudnia trafienie skalpelem w odpowiednie miejsce i poprawne wycięcie, ale jeśli się uda jest szansa na ładny jednolity kadłub. Oczywiście trzeba też bardzo uważać, żeby go nie pobrudzić, taka już natura jasnych modeli. | Another solution worthy of praise is the lack of edges of plating elements. They are printed on a grey background, there are no black outlines. This, of course, makes it difficult to put the scalpel to the right place and the correct excision, but if you succeed, there is a chance for a nice, clean fuselage. Of course, you also need to be very careful not to get it dirty, that's the nature of bright models. |

| Segmenty kadłuba trzeba w miarę na bieżąco uzupełniać wyposażeniem wnętrza. Budowa kabiny załogi przeplata się z powstawaniem kadłuba. Jest to rozwiązanie dość abstrakcyjne dla mnie, bo jestem przyzwyczajony do tego, że najpierw powstaje całe wyposażenie kabiny, które później znika pod poszyciem. | Fuselage segments need to be equipped with interior equipment as needed. The construction of the cockpit is intertwined with the building of the fuselage. This is quite an abstract solution for me because I'm used to that the first, all the cockpit equipment is assembled, and then I cover it with a skin. |


| Jak już jestem przy wyposażeniu kabiny to wypada powiedzieć, że jest ono bardzo, ale to bardzo mocno zdetalizowane. Jest masa dźwigienek, pokręteł i innych drobiazgów. Podoba mi się to! W segmencie za tylnym fotelem są nawet linki sterowe odpowiedzialne za poruszanie sterami wysokości i kierunku. Myślę, że nie będzie ich później widać, ale świadomość, że tam są pozostanie. Są też linki cięgna lotek. Zanim zabiorę się za tę drobnicę chcę mieć przygotowane kilka segmentów kadłuba. Wewnętrzne paski poszycia należy uzupełnić listwami usztywniającymi poszycie kadłuba, to dość żmudne i czasochłonne zajęcie. Żeby nie popaść w monotonię sklejam sobie też inne zespoły, np. zbiornik paliwa. Do zrobienia zostało jeszcze dużo, o tym będzie w kolejnym odcinku. | Talking about the equipment of the cockpit, it should be said that it is very, but very strongly detailed. There is a lot of levers, knobs and other small things. I like this! In the segment behind the rear seat, there are even an elevator and rudder cables. I think you will not see them later, but the awareness, that they are there, will remain. There are also aileron cables. Before I start to assemble details, I want to have several fuselage segments ready. The inner plating stripes should be supplemented with slats stiffening the fuselage plating, this is a rather tedious and time-consuming task. In order not to fall into monotony, I make other parts, e.g. the fuel tank. There is still a long way to go, this will be in the next episode of the model build. |


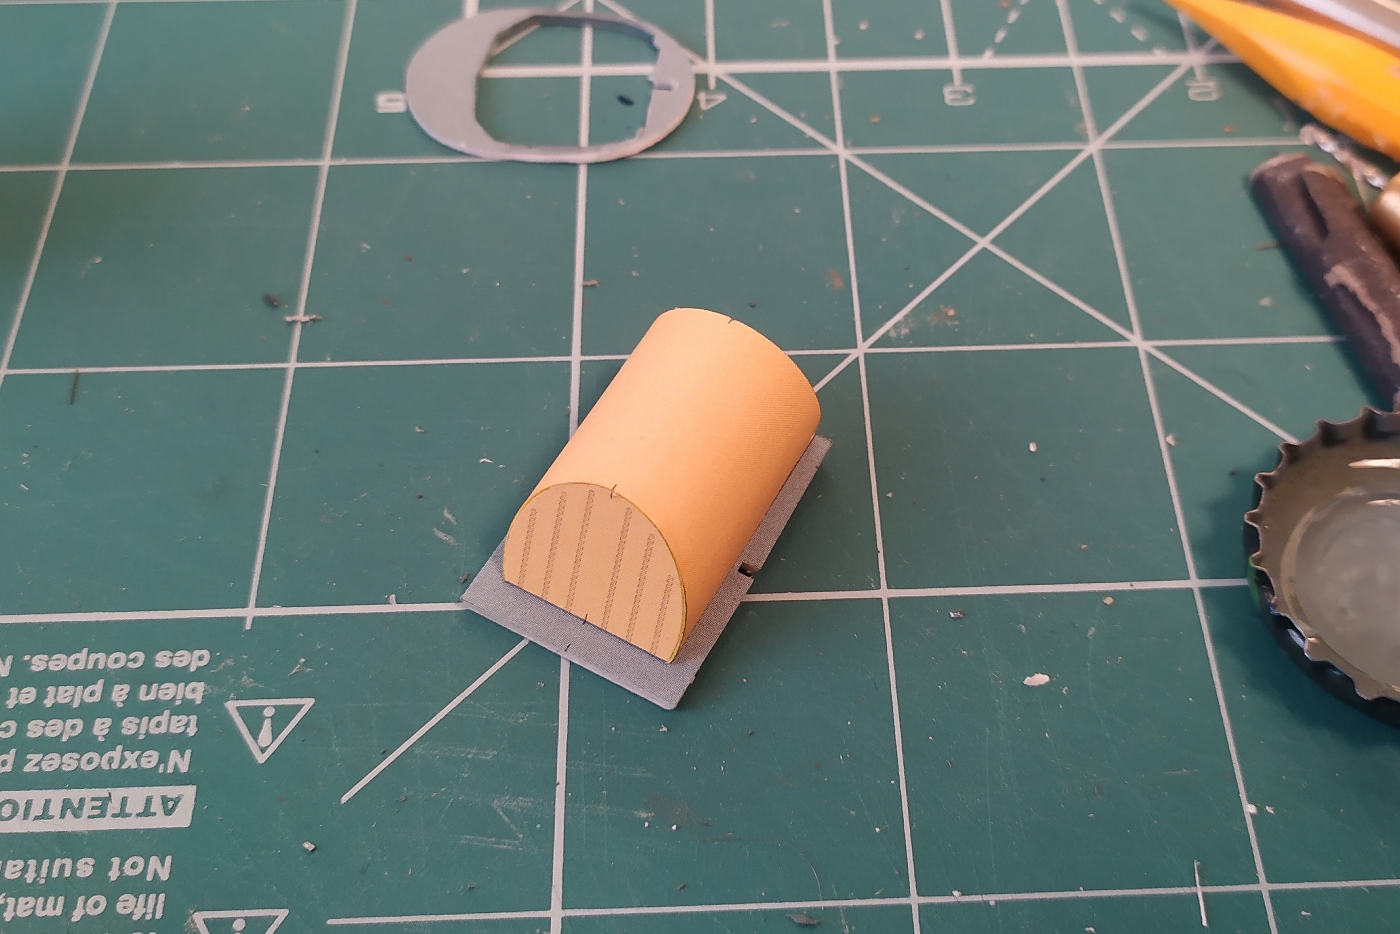


| I jeszcze kilka zdjęć pokazujących to, co udało mi się do tej pory zrobić oraz próby złożenia segmentów kadłuba na sucho. W paru miejscach widać, że granice kolorów się ze sobą nie zgrały na łączeniach, ale nie zwracajcie na to uwagi, tak jak wspomniałem - elementy nie są jeszcze ze sobą sklejone. | And a few photos showing what I've managed to do so far and attempts to assemble without glue fuselage segments. In a few places you can see that the borders of colours didn't fit with each other, but do not pay attention to it, as I mentioned - the elements are not yet glued together. |


| Wstęp do tej relacji powstał mniej więcej w tym samym czasie kiedy naklejałem wręgi na tekturę. Teraz po upływie kilkunastu dni, kiedy mam już trochę sklejone, napisałbym go już inaczej. Pozostawiłem go jednak zostawić bez zmian żeby było widać jak zmieniło się moje podejście do tej konstrukcji. Może tak jak napisałem, nie jest to samolot "z mojej bajki" i nie byłem nim wcześniej zainteresowany, ale składając kolejne segmenty filigranowego kadłuba zaczynam się tym modelem fascynować. Model zauroczył mnie swoją delikatnością, poza tym jak do tej pory klei się wybornie. Dodam jeszcze, że w obecnej sytuacji, kiedy wszystko stoi na głowie, budowanie tego niewinnego samolociku sprawia mi wiele radości i daje poczucie spokoju. | The introduction to this model build report was made around the same time when I prepared the first parts of the framework. Now, after a dozen or so days, when I have a few parts glued together, I would write it differently. However, I left it unchanged so that you can see how my approach to this plane has changed. Maybe, as I wrote, this is not my cup of tea and I was not interested in it before, but assembling the next segments of the filigree fuselage I am getting fascinated with this model. The model charmed me with its delicacy, besides, it fits all perfectly so far. I will add that in the current situation in the world when everything is turned on its head, building this innocent plane gives me a lot of joy and a sense of peace. |
No ładnie się zaczyna. Będzie sukces i co podziwiać. Pozdrawiam i powodzenia.
OdpowiedzUsuńwitam
OdpowiedzUsuńjest gdzies cd.