
| Niniejszym dobiegła do końca jedna z najwspanialszych moich przygód w modelarstwie kartonowym jaką była budowa modelu Messerschmitta Bf-110 G4/R8 z Kartonowego Arsenału. Zapraszam na relację z "ostatniej prostej". | One of my greatest adventures in scale modelling, which was the construction of the Messerschmitt Bf-110 G4 / R8 model from Kartonowy Arsenał, came to an end. I invite you to read the report from the final stretch. |
.


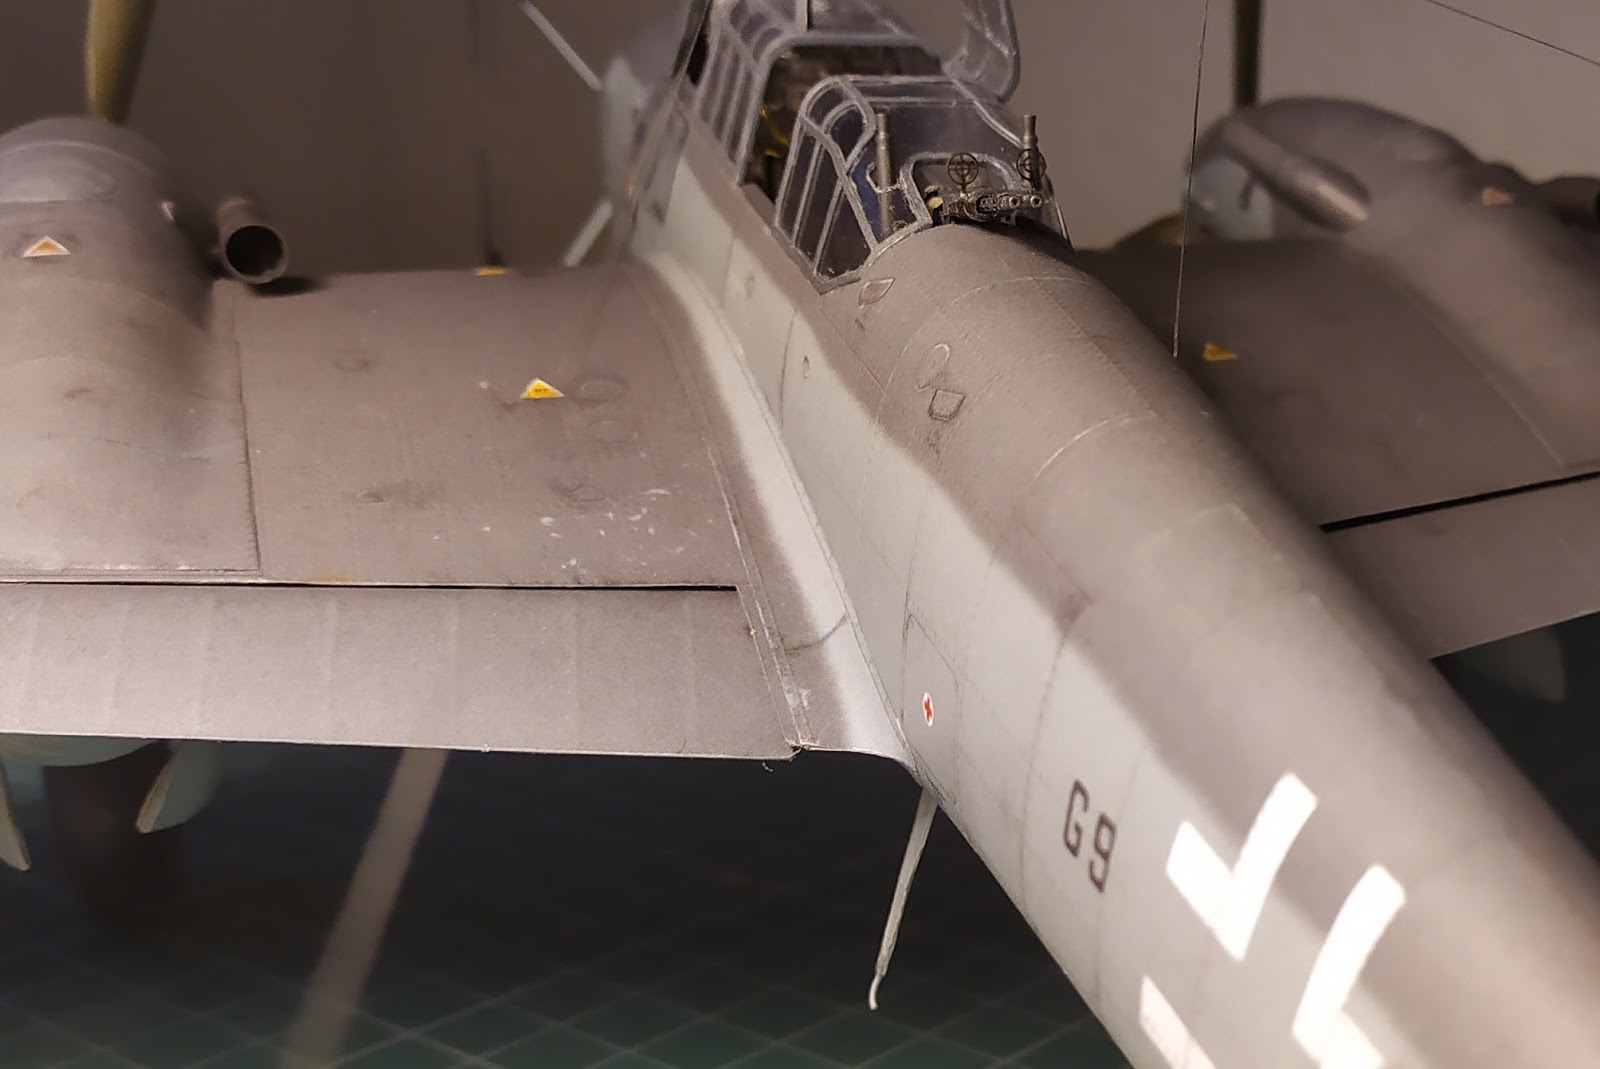
| Doszedłem do momentu budowy, w którym należało zabrać się za montaż poszczególnych zespołów elementów i modułów sklejonych wcześniej. W pierwszej kolejności połączyłem kadłub ze skrzydłami. Są one mocowane na bagnetach wystających po obu stronach kadłuba, po dwa na każde skrzydło. Wsuwa się je w przygotowane w skrzydłach wpusty (kesony). Wytrzymałość tej konstrukcji budziła na początku moje wątpliwości. Wspomniane bagnety są przymocowane do kartonowego stelażu przyklejonego do burty kadłuba od zewnątrz. Ze względu na konstrukcję wnętrza kabiny nie ma dźwigarów przechodzących przez środek kadłuba, co oczywiście czyni konstrukcję mniej sztywną. Należy pamiętać, że do skrzydeł mocowane jest główne podwozie, więc większa część ciężaru modelu będzie spoczywać właśnie na skrzydłach. Stąd moje wątpliwości, a wierzcie mi na słowo, ten model lekki nie jest... | Finally, the moment has arrived that it was necessary to start assembling individual sets of elements and modules prepared earlier. First, I connected the fuselage with the wings. They are installed on girders protruding on both sides of the fuselage, two for each wing. They are inserted into the grooves prepared in the wings (caissons). At first, the strength of this construction raised my doubts. These girders are attached to a cardboard frame stuck to the fuselage side from the outside. Due to the interior design of the cockpit, no girders are passing through the middle of the fuselage, which of course makes the construction less rigid. Please note that the main landing gear is attached to the wings, so most of the weight of the model will rest on the wings. Hence my doubts, and believe me, this is not a light model ... |


| Sam montaż przebiegł pomyślnie. Ze względu na twardość i wytrzymałość spoiny, do wklejenia bagnetów w kesony zastosowałem klej introligatorski. Przejścia kadłub-skrzydło sklejały się bez problemu, tu oczywiście użyłem BCG. Pewne niedociągnięcia znajdują się na spodzie modelu, nie do końca zgrały mi się oklejki z liniami na kadłubie, ale może być to spowodowane błędami popełnionymi przy oklejaniu kabiny. Geometria skrzydeł jest w porządku, górne oklejki spasowały się idealnie. Dół muszę zaakceptować taki jaki jest. Po doklejeniu skrzydeł, na moim biurku pojawił się nagle model o rozpiętości prawie pół metra. Ciężko było manewrować tym diabelstwem przy montowaniu oklejek. Kilka razy zahaczyłem końcówkami skrzydeł o swoją koszulkę albo biurko, wyłamałem też jedną z luf działek instalacji Schräge Musik. Na szczęście wszystko udało się naprawić. Cieszę się, że nie uległem pokusie, posłuchałem instrukcji i nie dokleiłem przed montażem skrzydeł części ogonowej do reszty kadłuba. Już widzę jakbym pluł zahaczając o coś statecznikami. Jednakże po zakończeniu montażu skrzydeł doklejenie ogona stało się koniecznością. Manewrowanie modelem stało się więc nieco trudniejsze. Przed przystąpieniem do montażu podwozia zabezpieczyłem go odpowiednio, tak aby nie wyrządzić więcej szkód. | The assembly itself was successful. Due to the hardness and strength of the weld, I used bookbinding glue to stick the girders into the caissons. The fuselage-wing transitions stuck together without a problem. Here, of course, I used BCG glue. Some shortcomings are found on the bottom of the model, I didn't quite get the transitions with lines on the fuselage, but this may be due to mistakes made when building the cockpit. The geometry of the wings is fine, the top fuselage-wing transitions folded perfectly. I have to accept the bottom as it is. After assembling the wings, a model with a span of almost half a meter appeared suddenly on my desk. It was hard to manoeuvre this giant while installing transitions parts. Several times, I hooked the wingtips on my shirt or desk and also broke one of the barrels of the Schräge Musik installation cannons. Fortunately, everything was fixed. I am glad that I listened to the instructions and didn't assemble the tail part to the rest of the fuselage before the wings. However, after the installation of the wings, I had to put together the tail with the rest of the model. Manoeuvring the model has become a bit more difficult. Before installing the undercarriage, I secured it properly so as not to cause more damage. |


| Podwozie jest ostatnim dużym zespołem części, który pozostał do sklejenia. Konstrukcja podwozia głównego przypomina nieco tę, z którą nie tak dawno spotkałem się przy budowie modelu Ju-88 C-6. Autorzy zadbali o bardzo wierne odwzorowanie tej konstrukcji, stąd mamy do czynienia z bardzo dużą ilością różnego rodzaju drobnych elementów. Ogólnie, kleiło się to bardzo dobrze, ale jest kilka rzeczy, które muszę skomentować. Na początek golenie podwozia. Składają się one z drutu, zwijki z offsetu oraz kartonowych pierścieni różnej średnicy, które naklejane są na zwijkę oklejoną na drucie. Spotkałem się już przy Airacobrze z tym rozwiązaniem. Ma ono swoje plusy, bo wszystkie szwy znajdują się w jednym miejscu, nie skleja się ich na zakładkę tylko na styk, a nadrukowane na pierścieniach białe pola, na które przyklejamy kolejne elementy nie rozjeżdżają się na wszystkie strony. Trochę to skomplikowane, choć efekt jest niezły. Mimo tego uważam, że dużo lepszym rozwiązaniem jest kolorowa zwijka wydrukowana na offsecie. Ślizgi amortyzatorów prysnąłem farbką koloru aluminium. | The undercarriage is the last large group of parts that remains to be built. The design of the main chassis reminds me of the one that I met not so long ago when building the Ju-88 C-6 model. The authors took care of a very faithful reproduction of this construction, hence we are dealing with a very large number of various types of small elements. In general, the process of sticking went very well, but there are a few things that I need to comment on. Let's start with undercarriage legs. They consist of wire, paper rolls and cardboard rings of different diameters, which are glued onto a roll covered with wire. I have already met this solution at Airacobra. It has its advantages because all places of joining are in one line and they are smooth (without "stairs"). The white fields printed on the rings, to which we put the subsequent elements, do not diverge to all sides. It is a bit complicated, although the effect is quite good. Despite this, I think that one roll printed on a thin offset paper is a much better solution. Shock struts were sprayed with aluminium paint. |


| Nie podoba mi się projekt zastrzałów goleni podwozia. Uważam, że elementy 125 h,i,j,k są ciężkie do sklejenia w zaproponowanej formie. Dałem im szansę i pierwsze dwa z ośmiu zastrzałów spróbowałem skleić zgodnie z projektem, ale zgodnie z przewidywaniami poległem. Projekt zakłada, że na przycięte fragmenty drutu 1 mm należy nawinąć wydrukowane na kartonie zwijki, których wewnętrzna średnica po zwinięciu ma 1 mm. Na szczytach zwijek znajdują się wystające zaczepy, które po owinięciu na drucie powinny być dokładnie na przeciwko siebie. Dodatkowo, przed sklejeniem elementy należy pomalować z drugiej strony tak, żeby zaczepy miały po obu stronach ten sam kolor. W teorii brzmi to dobrze, ale w praktyce jest tak, że zwijane elementy się rozwarstwiają, szew wychodzi paskudnie, dwa zaczepy oderwały się podczas formowania, inne się powyginały. Malowanie wewnętrznych stron zaczepów i tak do poprawki. Moim zdaniem nie tędy droga. Wystarczyłyby proste, kolorowe zwijki wydrukowane na offsecie, zaczepy zaprojektowane jako osobne elementy doklejane do gotowych zwiniętych zastrzałów. Od pozostałych mi sześciu zastrzałów odciąłem zaczepy, rozwarstwiłem oddzielone od nich zwijki i nawinąłem na przycięte druty. Zaczepy dokleiłem na końcu. Tak jest znacznie prościej. Na poniższych zdjęciach dobrze widać proces składania tych elementów. | I don't like the design of undercarriage legs struts. I believe that the parts 125 h, i, j, k are difficult to make. I gave them a chance and I tried to glue the first two of the eight struts according to the design, but I failed as expected. The design assumes that the cut pieces of 1 mm wire should be wrapped with paper parts, whose internal diameter after rolling is 1 mm. On the tops of the struts parts, there are catches. After wrapping the parts on a wire, they should be directly opposite each other. Besides, before glueing the elements they should be painted on the other side so that the catches have the same colour on both sides. In theory, this sounds good, but in practice, it is that the rolled parts are delaminated, the seam comes out nasty, two catches broke off during forming, others bent. I had to paint the catches from the other side one more time. In my opinion, this solution doesn't work at all. It would be enough to give simple rolls printed on a thin offset paper and catches should be designed as separate elements glued to ready-rolled struts. I cut off the catches from the remaining six struts, delaminated the rolls and wrapped them on wires. I attached the catches at the end. It's much simpler. The following photos clearly show the process of assembling these elements. |


| Po sklejeniu wszystkich potrzebnych elementów i przygotowaniu drutów nadszedł czas na montaż podwozia. Fascynujące było składanie tej dość skomplikowanej konstrukcji i obserwowanie jak z każdą doklejoną częścią zbliżam się do końcowego efektu. Sklejenie tego wymagało sporo cierpliwości i precyzji, ale rezultat rekompensuje włożony trud. W międzyczasie skleiłem też pokrywy podwozia, to była właściwie tylko formalność, nic nadzwyczajnego. | After preparing all the necessary elements and the wires, it's time to assemble the undercarriage. It was fascinating to build this rather complicated structure and to watch how I step by step approach the final effect. Building this required a lot of patience and precision, but the result compensates for the effort. In the meantime, I glued the undercarriage hatches doors, it was just a formality, nothing unusual. |


| Następnie zabrałem się za montaż sklejonych wcześniej klap i lotek. Tutaj została mi do zrobienia masa drobiazgów w postaci zawiasów i widocznych na zewnątrz elementów mechanizmu poruszania powierzchniami sterowymi. Do wklejenia pozostały także elementy dolnego poszycia skrzydeł zasłaniające szparę pomiędzy skrzydłami a klapami. Na tym etapie skleiłem także wyważenia masowe lotek. Do wyboru miałem dwa zaproponowane przez autorów rozwiązania. Odrzuciłem wariant ze sklejaniem "łezek" z listków i skorzystałem z prostszej opcji, którą zmodyfikowałem po swojemu. Na sklejone elementy nałożyłem krople kleju introligatorskiego, pozwoliłem im wyschnąć i pomalowałem odpowiednim kolorem. Myślę, że efekt jest bardzo dobry. | Then, I started to assemble previously glued flaps and ailerons. Here, I had to prepare a lot of small things, e.g. hinges and elements of the flaps and ailerons movement mechanism which are visible outside. There are also a few parts of the bottom wing cover which are needed to fill the gaps between the wings and the flaps. At this stage, I also glued the aileron mass balances. I had a choice of two solutions proposed by the authors. I rejected the variant with forming "tears" from the leaves and used the simpler option that I modified in my own way. I applied drops of bookbinding glue to the glued elements, let them dry and painted them with the right colour. I think the effect is very good. |


| Korzystając z tego, że model nadal leżał dobrze zabezpieczony "na plecach" zabrałem się za montaż dodatkowych zbiorników paliwa. Tutaj trzeba było zrobić stelaż z drutu, w sumie żadna wielka filozofia, jedynie trochę trudne było uchwycenie odpowiedniej geometrii. Na tym etapie dokleiłem też kilka anten na spodzie skrzydeł oraz pod kadłubem. No i jeszcze te urocze uchwyty pod belką ogonową. Od tego momentu chwytanie modelu i manewrowanie nim stało się zajęciem wymagającym skupienia i ostrożności niczym przy grze w bierki. A za chwilę stanie się to jeszcze trudniejsze. | Taking advantage of the fact that the model was still lying well-secured "on the back" I started to install additional fuel drop tanks. Here, it was necessary to make wire frameworks. All in all, it was no great philosophy, only a little difficult to catch the appropriate geometry. At this stage, I also attached several antennas to the bottom of the wings and under the fuselage. And also those cute handles under the tail. From that moment on, touching the model and manoeuvring it became a task that requires concentration and caution, like playing pick-a-stick. And in a moment, it will become even more difficult. |


| Nadszedł moment, w którym na nosie modelu miały pojawić się anteny radaru FuG-220 Liechtenstein. Wykorzystałem zestaw toczonych elementów oferowanych przez Wydawnictwo Kartonowy Arsenał. Uważam, że w tym przypadku grzechem by było nie skorzystać z tego zestawu, bo wpływa znacząco na wygląd całości. Te anteny są tutaj prawdziwą "wisienką na torcie" i będą przyciągały uwagę każdego, kto będzie oglądał model. Zanim jednak zamontowałem je na modelu stoczyłem z nimi ciężką walkę o to, żeby wyglądały tak jak powinny. Same ramiona, na których się opierają zamontowałem w przygotowanych wcześniej wpustach. Anteny pomalowałem wstępnie aerografem, dopieściłem ręcznie, pędzelkiem. Pierwsza antena została doklejona bez problemu. Schody zaczęły się, gdy zacząłem doklejać kolejne. Trzeba było kontrolować ich położenie względem siebie, zachować zgodność w pionie i poziomie i co najważniejsze - montując kolejną nie zahaczyć i nie urwać poprzedniej. Nie do końca mi się to udało. Myślę, że sytuację panującą w tym czasie przy moim biurku najlepiej oddaje reakcja mojej żony po tym jak kolejny raz wydobyłem z siebie dźwięki oznajmiające, że zahaczyłem się o anteny i coś urwałem. "Nigdy więcej nie uwierzę w to, że klejenie modeli to jest relaksujące zajęcie!" - krzyknęła z drugiego pokoju. Jakie są to dźwięki musicie sobie sami dopowiedzieć :) | The moment has come when the FuG-220 Liechtenstein radar antennas were to appear on the nose of the model. I used a set of turned elements offered by the Kartonowy Arsenał Publishing House. I believe that in this case it would be a sin not to use this set, because it significantly affects the appearance of the whole. These antennas are a real "icing on the cake" and will attract the attention of everyone who will watch the model. However, before I installed them on the model, I had a hard fight with them to assembly them properly. First, I put in the arms in the caissons which had been prepared earlier. The antennas are going to be installed on the arms. The antennas were pre-painted with an airbrush, finished by hand with a brush. The first antenna was attached without a problem. It has begun to be difficult when I started to glue the others. I had to monitor their position in order to not lose the geometry, maintain horizontal and vertical conformity. And most importantly - do not hook the next one and do not break the previous one. I didn't quite succeed. It wasn't easy to reach the final result. While I was working on assembling the antennas, I heard my wife shouting from the other room: "I will never believe that scale modelling is a relaxing hobby!" I will leave it to your imagination to what sounds she reacted this way :) |


| Początkowo chciałem zrobić koła we własnym zakresie, ale po tym jak zobaczyłem żywiczne koła oferowane przez Wydawnictwo Kartonowy Arsenał zdecydowałem się na ich zastosowanie. Wyglądają naprawdę dobrze, posiadają delikatne ugięcie opon, opony głównego podwozia mają na bokach subtelnie naniesione szwy/łączenia. Kółko ogonowe ma ładny bieżnik poprzeczny, przednie nie mają go wcale, zgodnie z tym jak było w oryginale. Felgi kół podwozia głównego są w pełni zdetalizowane, dodałem jedynie przewody hamulcowe. Wszystko pomalowałem aerografem, felgi na czarno, opony na kolor ciemnoszary. Same opony na koniec przykurzyłem proszkiem z mieszanki startych pasteli. | Initially, I wanted to make wheels on my own, but after I have seen the resin wheels offered by the Kartonowy Arsenał Publishing House I decided to use them. They look really good, have a slight tire deflection, the tires of the main chassis have subtle seams/joints on the sides. The tail wheel has a nice lateral tread, the front ones do not have it at all, as it was in the original. Main wheel chassis rims are precisely detailed, I only added brake wires. I painted everything with an airbrush; rims are black, tires are dark grey. Finally, I added a little bit of dust on them. |


| Po zamontowaniu kół przyszedł czas na lakierowanie. Na tym etapie osłona kabiny nie była jeszcze doklejona do modelu. Tak jak wspominałem w poprzednim odcinku relacji, części z których skleiłem ramki osłony zostały polakierowane już wcześniej, przed sklejeniem. Dzięki temu nie musiałem teraz bawić się w maskowanie całej szklarni. Zamaskowałem jedynie osłonę reflektora lądowania i szybki celowników w kabinie pilota. Sam proces lakierowania to sprawdzona już metoda czyli dwie warstwy lakieru Tamiya TS-13 (bezbarwny połysk), a po ich wyschnięciu dwie warstwy Tamiyi TS-80 (bezbarwny mat). W miejscach gdzie wytrącił się talk - w tym przypadku pojawił się tylko w dwóch miejscach na dolnej powierzchni skrzydeł - poprawka połyskiem i jeszcze raz mat. Biały nalot zniknął. | After attaching the wheels, it was time for varnishing. At this stage, the canopy has not been attached to the model yet. As I mentioned in the previous episode of the model build, the parts of which I made the cover frames had been varnished before. Thanks to this, I didn't have to mask the entire "greenhouse". I only masked the landing reflector cover and the sight glass in the cockpit. The varnishing process itself is a proven method, i.e. two layers of Tamiya TS-13 (clear gloss), and after drying, two layers of Tamiya TS-80 (clear matt). White fur appeared in some places, it was talc. To correct it I used gloss varnish one more time and then matt varnish one more time. The white fur disappeared. |

| Po wyschnięciu lakierów wkleiłem do środka kabiny karabin maszynowy strzelca wraz z taśmami amunicyjnymi z wycinanki. Niestety nie znalazłem dla nich żadnej atrakcyjnej alternatywy. Następnie dokleiłem do modelu osłonę kabiny. Z prawej strony w środkowej części za słabo docisnąłem i powstała szczelina (patrz zdjęcie), poza tym poszło sprawnie. Przed galerią końcową postaram się jeszcze jakoś tę szparę załatać. Pozostało mi doklejenie pokryw osłony kabiny w pozycji otwartej, szyby pancernej na wiatrochronie, wklejenie Rurki Pitota, rozpięcie anteny pomiędzy masztem, a statecznikami i doklejenie celowników do MG-81Z. Tym samym budowa modelu po 223 dniach od pierwszego wbicia ostrza skalpela w arkusze wycinanki dobiegła do końca. I patrzeć na ten stojący przede mną model, który osiem miesięcy temu był zbiorem elementów wydrukowanych na kilkunastu arkuszach kartonu ,jest naprawdę wspaniałym uczuciem. Swoją drogą - zaczynając budowę szacowałem, że budowa zajmie przynajmniej rok. Nie spodziewałem się jednak, że ten model tak mnie wciągnie i budowa dostarczy mi tylu pozytywnych wrażeń. Zakładałem, że może się zdarzyć jakiś kryzys po drodze, który zatrzyma budowę na dłużej. Owszem, taki kryzys miał miejsce przy budowie gondoli silników, ale przezwyciężyłem go bardzo szybko, bo chęć dokończenia tego modelu była silniejsza. Było warto i jestem ogromnie zadowolony, że budowa szczęśliwie dobiegła do końca. Do zobaczenia w galerii końcowej! | After the varnish had dried, I added the gunner's machine gun with ammunition tapes from the set. Unfortunately, I did not find any attractive alternative for them. Then I attached the canopy to the model. On the right, in the middle part, I did not press well enough and a gap was created (see the photo), otherwise, it went easy. I will try to fill in the gap. I had to attach the covers of the cockpit cover in the open position, armoured windshield, stick the Pitot Tube, make the antenna between the mast and the vertical stabilizers and attach the sights to the MG-81Z. Thus, the construction of the model was completed after 223 days since the first insertion of the scalpel blade into the cardboard. Thid is a really great feeling to look at this model standing in front of me, which eight months ago was a set of elements printed on several sheets of cardboard. By the way - before starting the build, I had estimated that the construction would take at least a year. However, I didn't expect that this model would absorb me so much and the build would give me so many positive impressions. I assumed that there could be a crisis along the way that would stop construction for longer. In fact, such a crisis took place in the construction of the engine nacelle, but I overcame it very quickly because the desire to finish this model was stronger. It was worth it and I am extremely pleased that the build was successfully completed. See you soon in the final gallery! |


Brak komentarzy:
Prześlij komentarz